From Nigel's Kitchen Table
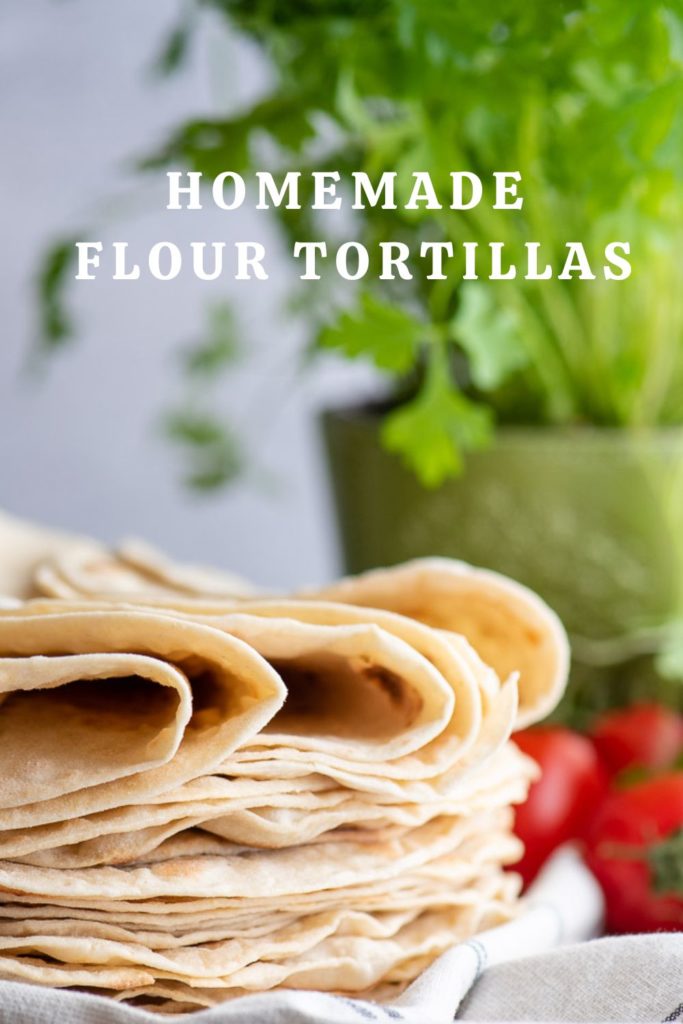
Flour Tortillas
Soft homemade flour tortillas made with four simple ingredients, perfect for tacos, wraps, burritos and quesadillas.
Navigate the recipe
On this page
The recipe
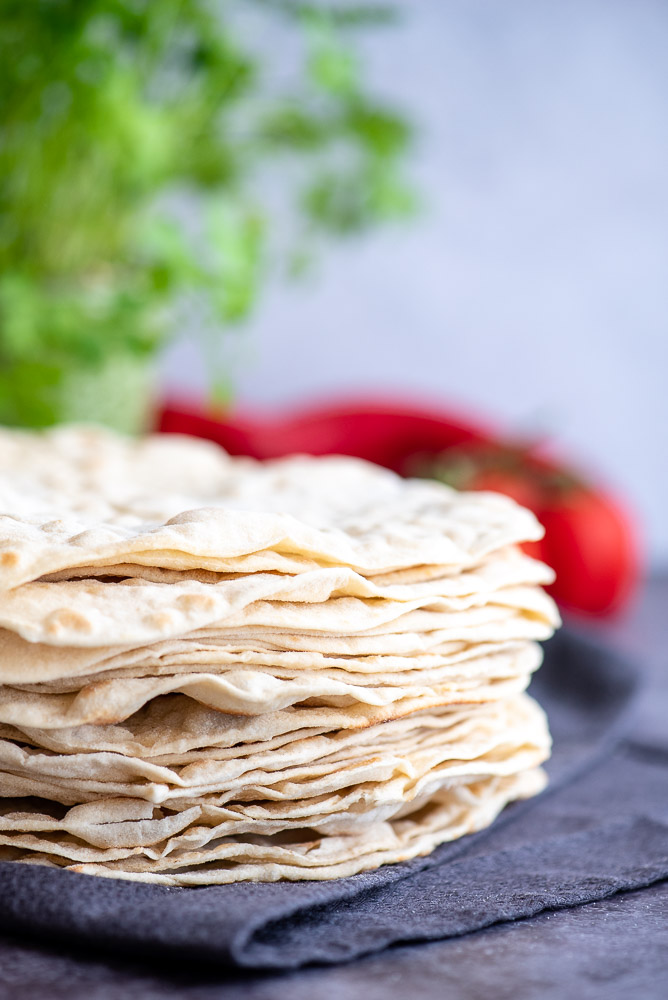
Super easy and just four simple ingredients to make the best homemade flour tortillas. They are so tasty, versatile and great to have at hand, perfect for making your favourite wraps, I love them!
Fresh flour tortillas are so much better than those bought in the shops, plus you probably already have everything you need to make them in your kitchen and you can even make and freeze them for later!
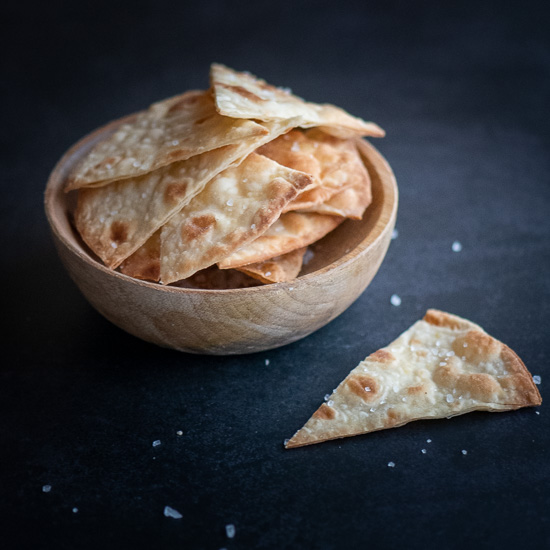
They are perfect for transforming into enchiladas, soft tacos, burritos, quesadillas, chimichangas, wraps and more. I even enjoy making them into tortilla chips too. Just brush both sides of a tortilla with olive oil, then cut them into triangles, place on a lined baking tray and season with salt (rock salt is my preference). Bake for 5 minutes at 200°C fan / 425°F / Gas 7. I love them as they are or used to dip in hummus, salsa or a bowl of chilli con carne.
Additionally, the flavour possibilities are endless and so easy. Check out my variations section for making spinach, sun dried tomato, and roasted garlic tortillas!
In the variations section, you will also find how to make the authentic recipe as well as whole-wheat tortillas.
If you like the sound of these fabulous tortillas, you might also like my pita bread or my naan bread recipes.
If you decide to give this recipe a try, let me know! Leave a comment below and rate it – it’s really helpful to me and other readers to know what you think! And don’t forget to take a picture and tag me @thegourmetlarder or hashtag it #thegourmetlarder on Instagram or Facebook. I love seeing what you’ve been baking! 🙂
CONTENTS
RECIPE HIGHLIGHTS
- EASE: simple. They just require a little patience, while waiting for the dough to rest.
- TASTE: scrumptious flat bread that’s perfect for filling.
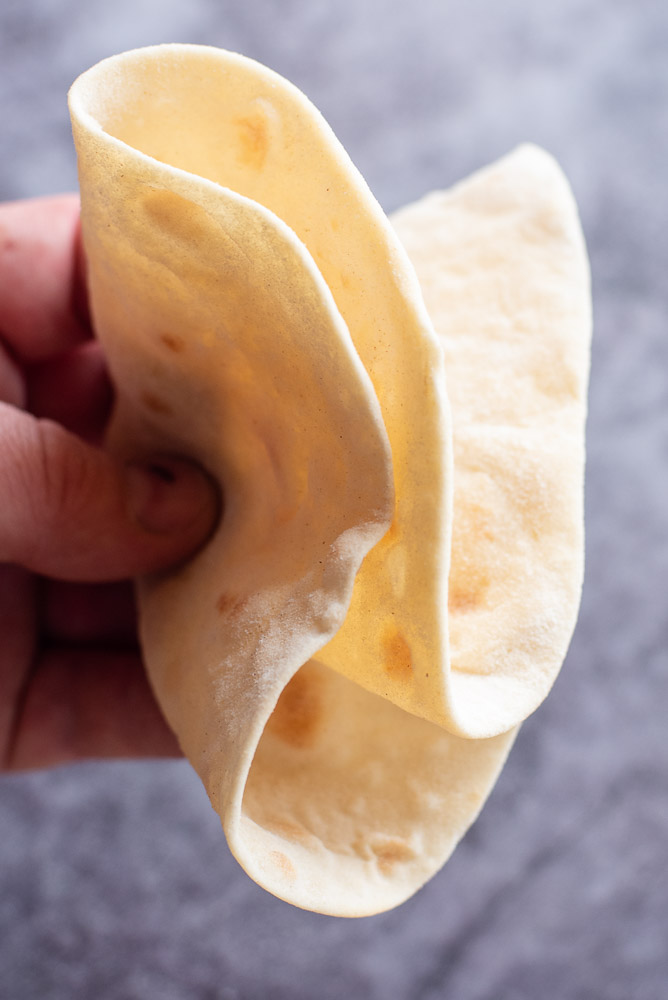
- TEXTURE: extra soft, slightly chewy and delicious served warm.


© THE GOURMET LARDER. All images and content are copyright protected. If you want to share this recipe, please do so using the share buttons provided. Please do not republish the recipe or its content in full instead, include a link to this post for the recipe. Further information can be found in my FAQ’s.
INGREDIENTS
For this recipe, all you need are these ingredients:
- Plain or all-purpose flour – we use a low gluten content flour as gluten makes the tortillas too chewy.
- Sea salt – elevates the other ingredients and brings out the best characteristics of the tortillas.
- Neutral-tasting oil (coconut, vegetable or sunflower oil) – creates moisture, softness and flexibility in the bread. For an authentic version see my variations section.
- Water – the hot water denatures the proteins within the flour, altering the gluten structure, making the tortillas less chewy and easier to roll without resilience.
- Salt – I highly recommend adding salt to your doughs and pastry. Salt helps balance out the sweetness and richness. It also elevates the other ingredients, bringing out the best characteristics of any recipe. I recommend using sea salt, Maldon Sea salt flakes or Cornish sea salt.
WHAT VARIATIONS CAN I MAKE?
- Authentic tortillas – all comes down to flavour and diet. To make them the authentic way replace the oil with 50g lard and rub this into the flour and salt before adding the water. Lard is animal product, so it is not suitable for vegetarians.
- Whole-wheat tortillas – simply substitute half the flour with whole wheat flour.
- Flavoured tortillas – the flavour possibilities are endless and so easy.
- Spinach – blend a handful of fresh spinach (approx. 50g) with the hot water from the recipe, then follow the method.
- Sun-dried tomato – blend together sun-dried tomatoes (approx. 12g) with the hot water and follow the recipe method.
- Roasted garlic – peel and slice 4 cloves of garlic. Place the oil from the recipe and the garlic into a small saucepan and place on a medium-low heat for 2-3 minutes. (Do not allow the oil to get to hot or the garlic will burn.) Remove from the heat and allow to sit for 15 minutes on the side to cool. Strain the garlic from the oil and add to the recipe as per the method.
If you experiment, please leave a comment at the bottom of the post – it’s really helpful to me and other readers to know how you got on. I regularly update these posts and the feedback I receive helps to make the recipes even more useful and interesting.
NUTRITION
Serving: one tortilla
I have provided some nutrition information as a guide. However, the data can vary for a recipe based on many factors such as precision of measurements, ingredients, or the source of nutrition data.
I make every effort to keep the information as accurate as possible but make no warranties regarding its accuracy.
I encourage you to make your own calculations based on the actual ingredients you use in your recipe.

STORAGE AND FREEZING
These tortillas keep well in the fridge for up to 5 days. Store them in an airtight container or a ziplock bag that has had the air pressed from it. They will feel stiff when they’re cold, but they will be nice and soft again if you simply reheat them using the stovetop pan method (just as you cooked them) or place them in a slightly damp paper towel and microwave for 10-20 seconds.
Freezing: They can be made in advance and frozen in an airtight container or a ziplock bag that has had the air pressed from it for up to 2 months.

© THE GOURMET LARDER. All images and content are copyright protected. If you want to share this recipe, please do so using the share buttons provided. Please do not republish the recipe or its content in full instead, include a link to this post for the recipe. Further information can be found in my FAQ’s.
TOOLS YOU’LL NEED
Here is a list of some kitchen equipment that I use and recommend for this recipe.
I love this rolling pin, its variable guide rings make rolling out biscuit doughs, pizzas, or flat breads so much easier!
These frying pans are quick and easy to clean, excellent quality and good value for money.
- Pre-Seasoned Cast Iron Skillet – 38 cm
- OXO Good Grips 30cm / 12″ Frying Pan Skillet with Lid, 3-Layered German Engineered Nonstick Coating, Stainless Steel Handle with Nonslip Silicone, Black
The first option is a classic cast iron skillet and the second is a really good quality non-stick pan that works really well.
Digital Kitchen Scales: For the most reliable results, I recommend weighing ingredients in metric measurements rather than using cups. Volume measurements can vary between cups and may lead to dry, dense or crumbly bakes. My recipes are carefully developed using metric weights so they are easier to recreate accurately at home. Weighing ingredients is also quicker, less messy and gives far more consistent results.
RECIPE TIPS
Adding water to the dough: make sure the water is not boiling but around 90°C (194°F). Use a metal spoon or stand mixer to work the dough until a sticky ball of dough begins to form.
Resting the dough: make sure to let the dough rest, the tortillas will be thinner and roll out more easily.
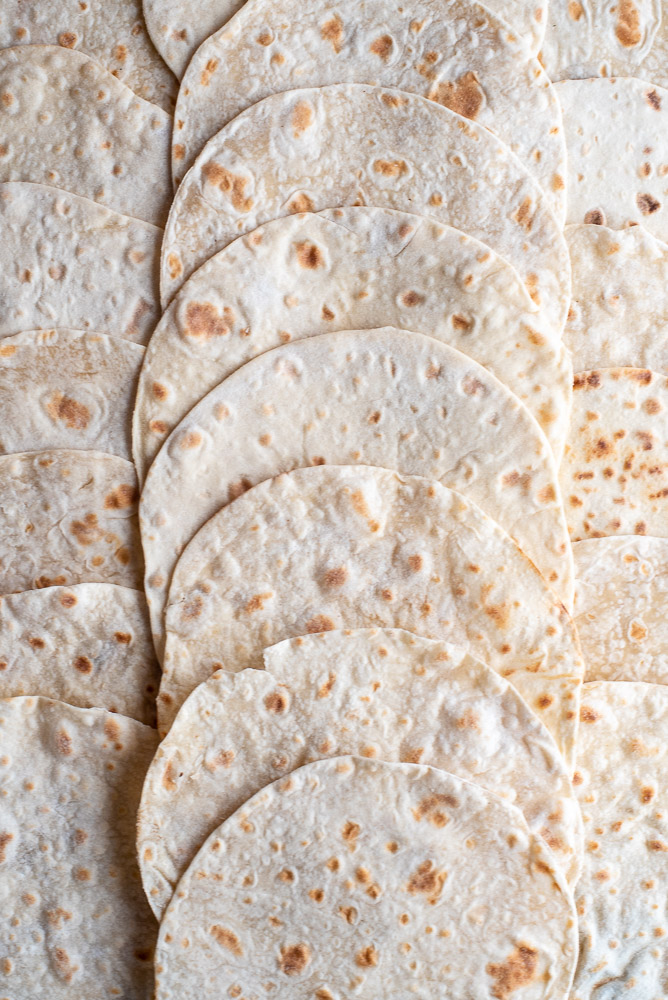
Rolling the dough: it’s important to roll all the way over the edges of the tortillas, this way they will be the same thickness all around and will cook evenly. You want the tortillas to be very thin, about 1 mm and about 20-22 cm (8-9 inches) wide, but don’t stress about rolling each piece of dough perfectly uniformed.
Cooking the Tortillas: if your tortillas feel stiff after cooking, they are over cooked. Reduce the heat or reduce the time of cooking. Only cook them long enough to get a few light brown spots on the surface before flipping. And cook them a little less if you are going to be reheating them.
Keeping soft tortillas: allow the tortillas to steam each other and they will stay nice and soft. Stack and wrap them up directly after cooking in a kitchen towel, they stay warm and moist, as the residual heat stays trapped within the towel.
Re-heating: to re-heat the tortillas, you can either use the stovetop pan method (just as you cooked them) or place them in a slightly damp paper towel and microwave for 10-20 seconds.

Flour Tortillas
INGREDIENTS LIST
- 250 g plain flour (all-purpose) (plus extra for dusting)
- 1 tsp fine sea salt
- 2 tbsp neutral-tasting oil (coconut, vegetable or sunflower oil)
- 175 g water (hot 90°C / 194°F)
Preparation
- In a medium mixing bowl or stand mixer, whisk together the flour, salt and oil (I used vegetable oil).
- Add the water and use a metal spoon or the stand mixer stirring until a sticky ball of dough begins to form. Then add a bit more flour, about 1-2 tablespoons and knead for about 2 minutes.
- Place the dough in a bowl, cover with a damp kitchen cloth and let it rest for 15-20 minutes. This stage is super important as it allows the dough time to rest helping the glutens to develop, which makes rolling the tortillas much easier.
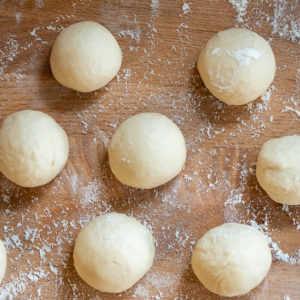
- Divide the dough into 8 pieces or you can weigh them out at 60g each. Roll each piece into a ball. Cover the balls with the kitchen cloth and allow to rest for another 10 minutes.
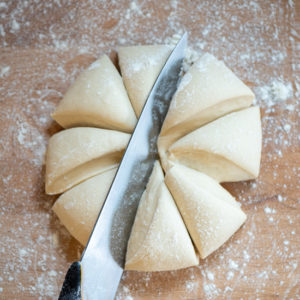
- Working with one piece of a dough at a time, dust your work surface with flour and flatten the ball with your fingers.

- Using a floured rolling pin and plenty of flour, gently roll out the tortilla from the centre to the top and then from the centre to the bottom. Rotate the dough and repeat until thin (about 1 mm) and you have a round shape about 20-22 cm / 8-9 inch in diameter. It is not necessary to apply too much pressure to the rolling pin.

- Heat a heavy based ungreased griddle or skillet over medium heat. If you don't have either, a frying pan will work fine. Place a tortilla inside the pan, as soon as brown spots begin to appear (approx. 45-60 seconds), flip the tortilla and cook on the other side, for about 1 minute longer. If large bubbles appear try to flatten them down as we don't want the dough layers inside to separate.Once baked, keep the tortillas stacked under a clean kitchen towel on a plate. It's important to allow the tortillas to steam each other. This helps them stay nice and soft.

- Repeat with the remaining dough balls.
Notes & Tips
FROM MY KITCHEN TO YOURS
Made this recipe?
I would love to hear how it turned out. Leave a comment and add a star rating to help other home cooks discover the recipe.
PLEASE LET ME KNOW HOW IT TURNED OUT FOR YOU!
If you tried these Flour Tortillas or any other recipe on my website, please let me know how you got on in the comments below. I love hearing from you. Also, please leave a star rating whilst you’re there!
Don’t forget to subscribe to my newsletter, so that you don’t miss out on more delicious recipes and follow me on social media.
HUNGRY FOR MORE? FOLLOW ME!
PIN THIS RECIPE ON PINTEREST TO SAVE AND SHARE WITH YOUR FRIENDS!


If you liked this flour tortillas recipe,
take a look at my inspirational recipe collection for more ideas.
Don’t forget to subscribe to my newsletter, so that you don’t miss out on more delicious recipes and follow me on social media.
HAPPY BAKING!

Keep cooking
You may also like
 Recipe
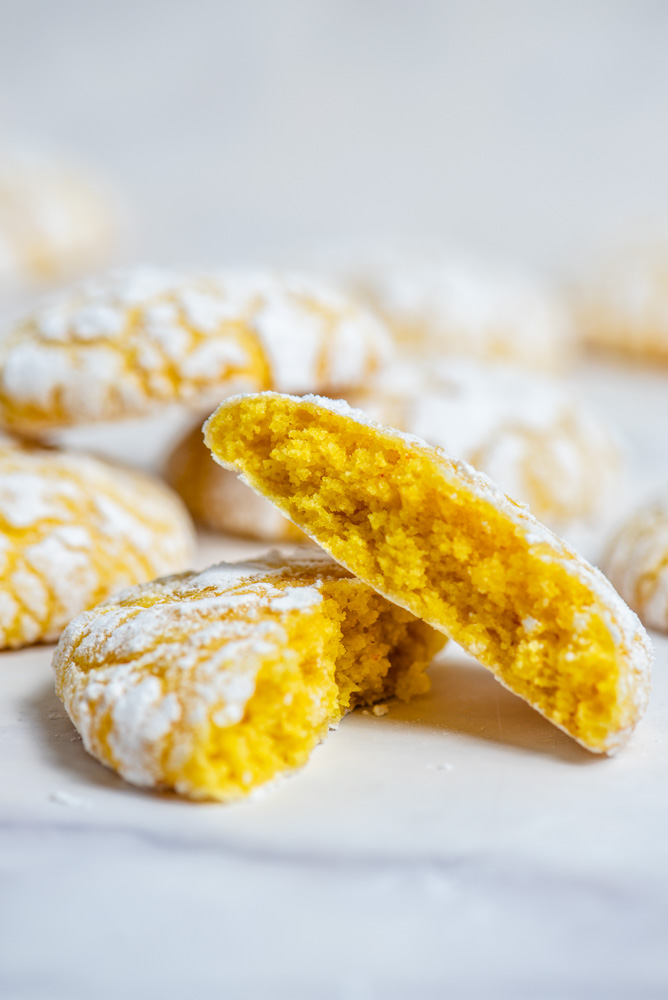
Lemon Crinkle Cookies
Soft lemon crinkle cookies with snowy cracked tops and a bright, refreshing citrus flavour.
View recipe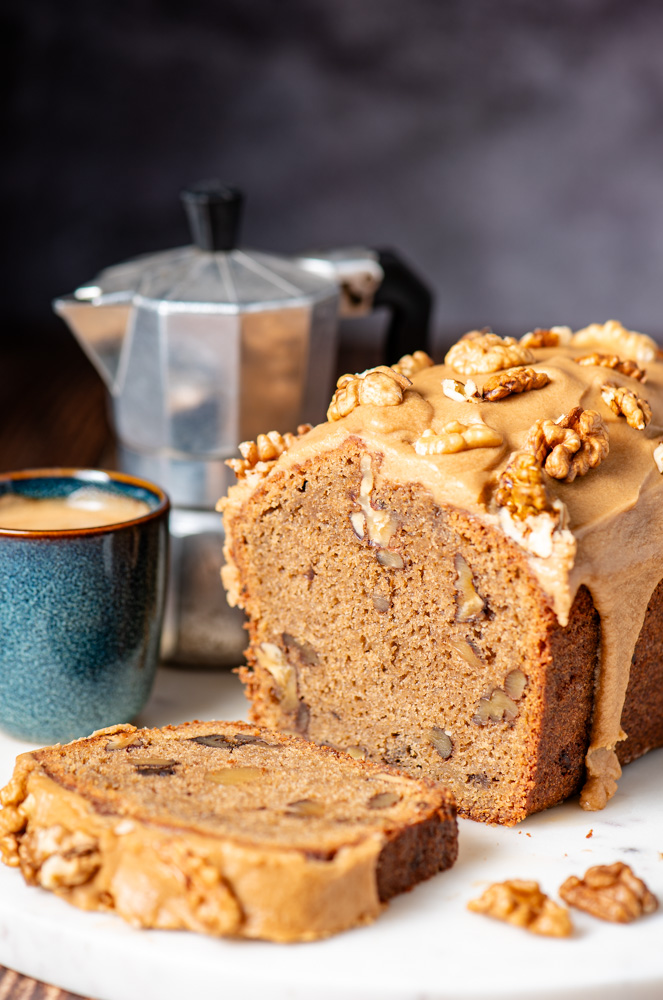 Recipe
Coffee & Walnut Loaf Cake
A moist coffee and walnut loaf cake finished with a smooth espresso and vanilla glaze.
View recipe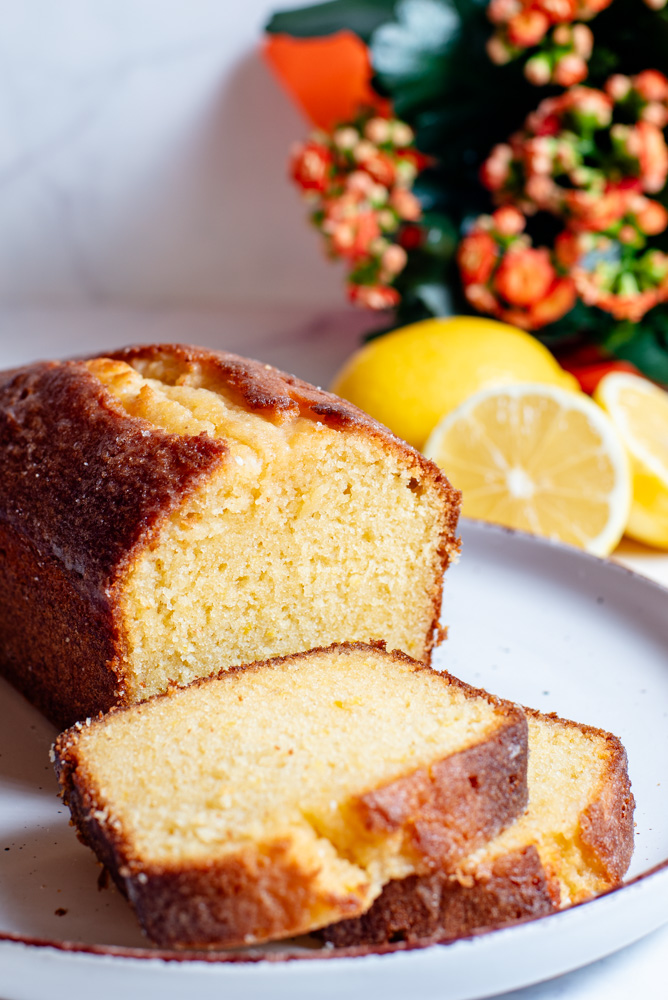 Recipe
Lemon Drizzle Cake
A moist buttery sponge soaked with bright lemon syrup and finished with a sweet citrus glaze.
View recipeAround the table
Questions and kitchen notes
Share how the recipe went, ask a question or leave a useful tip for the next person making it.
I love the idea of adding garlic to the mix! Thanks for the great idea of how to give my tortillas a little boost in flavor.