From Nigel's Kitchen Table
Fig, Cranberry & Walnut Bread
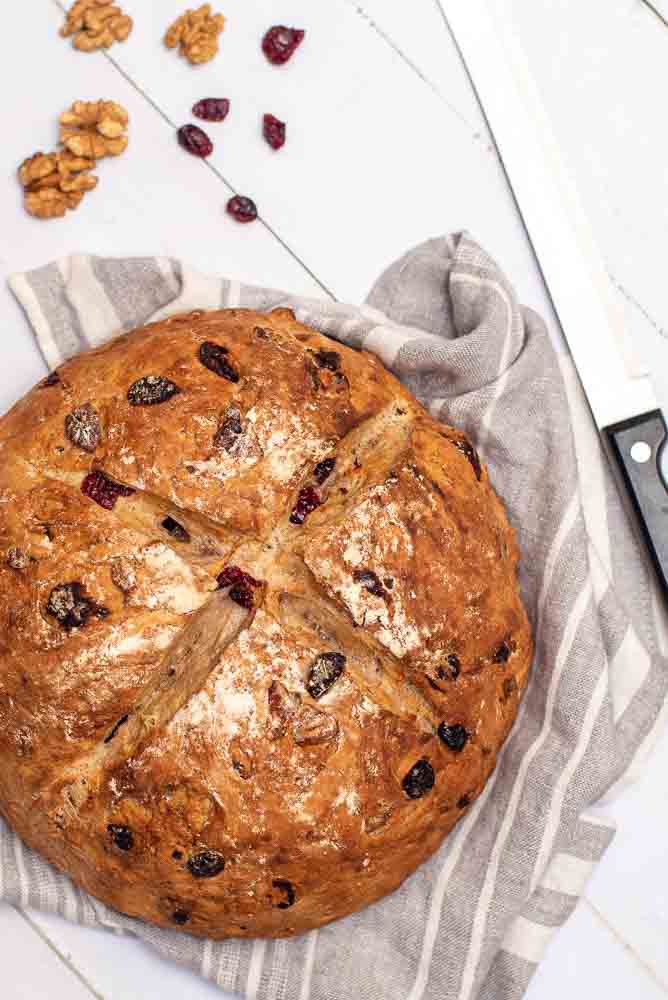
A hearty fruit and walnut bread packed with figs and cranberries, delicious with butter or cheese.
Navigate the recipe
On this page
The recipe, step by step
This fig, cranberry and walnut bread is packed with fruits and walnuts. Delicious slathered in butter made into a sandwich or served with cheese. With very little kneading and no special equipment, this recipe is perfect for newbies.
I don’t make breads with fruits very often, but this one is great for the days after Christmas when there is left over turkey for making sandwiches. It goes great with cold meats and cheeses and I often just end up eating it on its own with a little butter.
CONTENTS
RECIPE HIGHLIGHTS
- EASE: easy, just requires a bit of time and patience.
- FREE-FROM: this recipe is free from dairy, and added sugar.
- TASTE & TEXTURE: an amazing crumb, packed full of juicy figs and cranberries with the crunch of walnuts.
- SERVING: delicious on its own with butter, toasts up beautifully or perfect for cold cut sandwiches and cheese.
- QUANTITY: 14-16 slices (900g loaf)
- TIME: 25 minutes, plus 2 hours proving.

INGREDIENTS
For this recipe all you need are these ingredients:
- Yeast – ferments the natural sugars in the flour and releases carbon dioxide, but because the dough is elastic and stretchable the carbon dioxide cannot escape, causing the dough to rise. This is a simple bread recipe but because of the additional fruits and nuts, it requires a little more yeast than usual to help it rise.
- White bread flour – is made from hard, high-protein varieties of wheat, which have a higher gluten content than other flours. Gluten is the substance that makes the dough more elastic and stretchable, giving the final baked bread its fluffiness and lightness.
- Wholemeal flour – is generally made from a variety of grains but in some circumstances can be 100% wheat in the UK. It is an unrefined flour, made from grinding the whole grain. Wholemeal can also contain a variety of grains e.g. rye, spelt, corn, barley or buckwheat. Both wholemeal and whole wheat flour will work in this recipe, adding more flavour to the bread.
- Olive oil – enhances the texture, flavour, and moisture of bread. Also, free fatty acids in the oil make the dough softer and easier to handle.
- Dried figs and cranberries – add sweetness and texture to this bread.
- Walnuts – add texture and a nutty flavour.
- Salt – I highly recommend adding salt to your doughs. Salt helps balance out the flavours and elevates the other ingredients, bring out the best characteristics of any bread.
I recommend Maldon Sea salt flakes or Cornish sea salt, but any good quality salt is fine.

WHAT VARIATIONS CAN I MAKE?
- Alternative nuts – this recipe works well with different types of nuts. Try flaked almonds or pecans in the same weight as per the recipe instructions.
- Alternative fruits – I love the combination of the figs and cranberries, but if you prefer to omit or replace either of the dried fruits with an alternative then that’s fine. Try raisins, apricots or prunes using the same weight as described in the recipe.
Nutrition
Serving: one slice of bread
189.51 kcal
CALORIES · 9% DV
4.54 g
TOTAL FAT · 6% DV
32.72 g
CARBOHYDRATES · 13% DV
5.65 g
SUGARS · 6% DV
5.03 g
PROTEIN · 10% DV
121.12 mg
SODIUM · 6% DV
2.25 g
FIBRE · 8% DV
% Daily Values based on a 2,000-calorie diet
Nutrition information is provided as an estimate and may vary depending on the ingredients and portion size used.
STORAGE AND FREEZING
Like all bread, it’s best eaten on the day, but this bread recipe also tastes good the following day and it toasts really well. If your bread does go a bit stale, you can always use it to make homemade French toast or bread and butter pudding.
Freezing: If you don’t eat too much bread but like to have some at hand, I like to slice the loaf before placing it in the freezer. Then whenever I want some it’s easy to take out as many slices as I want and they defrost fairly quickly. Sometimes if I am in a hurry in the mornings, I toast a slice or two for breakfast.

TOOLS YOU’LL NEED
Here is some kitchen equipment that I use and recommend for this recipe.
I like the sturdiness of this bowl and its 4-litre capacity means I can use it for mixing just about everything in the kitchen. It is also microwave, freezer, and dishwasher safe.
These different size mixing bowls are really useful depending on the amount of food you are preparing. They also have airtight lids that fit snugly to seal and keep food fresh, great for using as dry storage bowls with lids. The plastic lid of the largest bowl has a removable centre, where one of 3 graters can be used for grating cheese or vegetables.
I love using these baking mats. They stop everything from sticking to the baking tray and are really easy to clean.
Not everyone is lucky enough to have one of these but they are useful if you do a lot of baking or making bread.
RECIPE TIPS
- Use room temperature ingredients for best results.
- Yeast requires warmth to become active and the trick is to get it started using warm water at body temperature 37°C (98°F). Make sure that it is not hotter than this as it will kill the yeast. You should be able to comfortably put your finger in it and hold it there. If it’s too hot it will kill the yeast. If you are using rapid-rise yeast, it does need to be dissolved in water and can be added directly to the other ingredients. This type of yeast will also take half of the time to make bread rise so you can easily skip the fist proving in this recipe.
- Kneading bread – is surprisingly important in creating a good loaf of bread. Flour your worktop, then push, pull and stretch the dough until it’s smooth and elastic. There is usually a tendency to add more flour as the dough can be sticky, but avoid this as it may result in a dry dense bread. The dough will become less sticky the more it is worked. The protein in the flour will absorb the water creating the gluten strands, resulting in a nice smooth elastic dough.
- Proofing – allows the yeast to work, helping the dough rise. Always place the dough to rest in a warm, humid environment until it doubles in size. Make sure to cover the dough with a damp, clean cloth. If you’re having trouble getting the dough to rise, place it in your oven with it turned off and the light inside on. This little heat from the the light should be sufficient to help it proof.
- Baking – bread is ready when the internal temperature reaches about 85-95°C (185-200°F). However, most people don’t own a thermometer for testing this. Instead, do the traditional method of tapping the bottom of your bread loaf. If it sounds hollow, it’s ready to come out of the oven.
Fig Cranberry & Walnut Bread
INGREDIENTS LIST
- 350 ml warm water
- 20 g fresh yeast (7g dried yeast)
- 400 g white bread flour
- 100 g wholemeal bread flour
- 1 tsp fine sea salt
- 1 tbsp extra virgin olive oil
- 60 g dried figs (cut into quarters)
- 60 g dried cranberries
- 60 g walnuts
Preparation
- Yeast: Dissolve the yeast in body temperature 37°C (98°F) warm water. Let it stand for about five minutes. This is known as the sponge method.
- Dough: In a large mixing bowl or stand mixer, gently mix together the flours, salt, dried fruits and walnuts.
- Add the yeast liquid and the olive oil to the dry ingredients. Mix the dough for approximately 1 minute. (You can also use a stand mixer fitted with the dough hook for this part if you wish.) Place the dough in a clean, oiled bowl and leave to stand in a warm spot for 20 minutes, covered with a clean damp cloth.
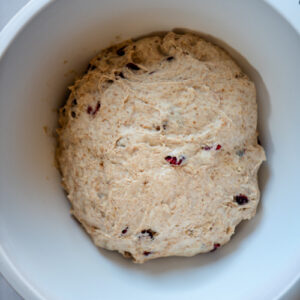
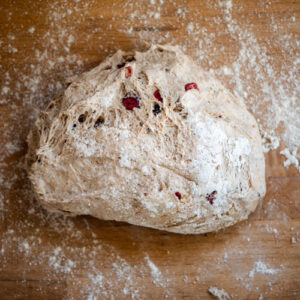
- Kneading: After the dough has rested a little, flour a work surface and tip the dough out onto it. Officially, this is where the dough needs to be Kneaded for 8-10 minutes until smooth. For this specific bread I don't tend to worry about kneading it so much. I generally give it a knead for about a minute to create a nice round dough ball and place it back in the clean oiled bowl.
- Proving: Cover with a damp cloth and leave to prove in a warm place until doubled in size. For me, this usually takes 45-60 minutes in a warm environment. Sometimes I also place it in the oven with the oven turned off and only the light on.

- Line a baking tray with baking / parchment paper or a silicone baking mat.
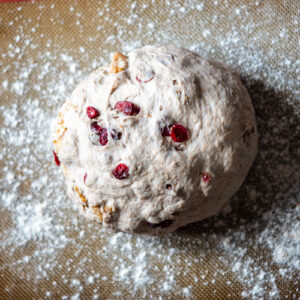
- Once risen, place the dough onto a lightly floured surface. Knock the dough back by folding it in on itself repeatedly for about a minute. Then shape the dough into a ball. Dust your baking tray lightly with flour and place the dough ball in the centre. Dust the top of the bread dough with a little flour and leave to prove again for an hour in a warm place until doubled in size.
- Preheat oven to 220°C / 200°C fan / 425°F / Gas 7.
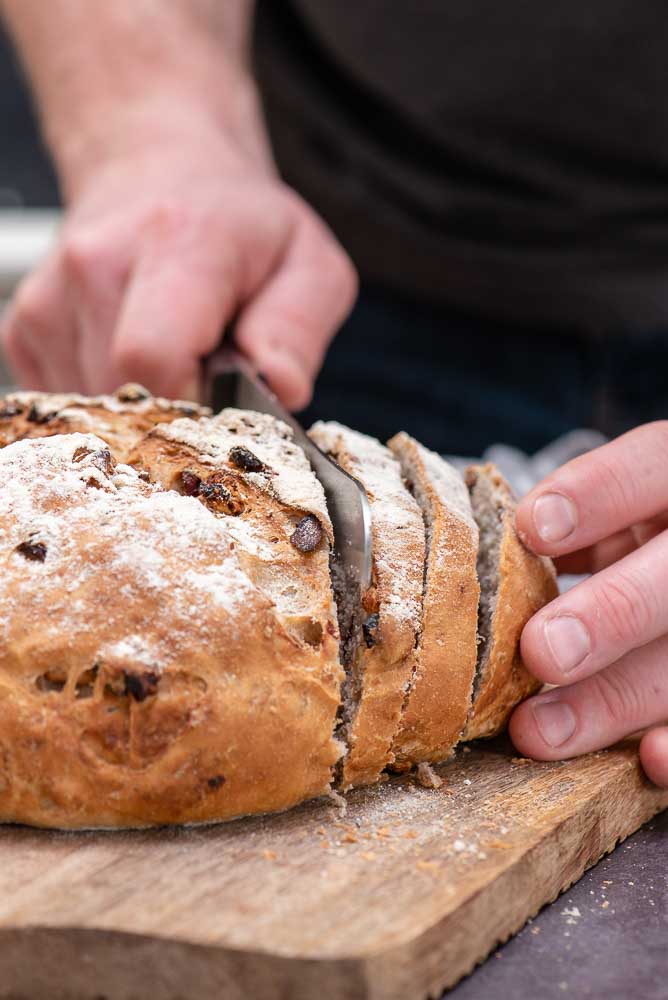
- Once the dough has risen, Use a very sharp knife, to make a cross in the top of the dough in a quick motion. Doing this quickly, the knife wont get caught in the dough and you will have nice neat lines.
- Steam: To help the loaf rise and get a good crust, I like to create a little steam at the beginning of the baking process. To do this, I place a heat resistant dish or baking pan filled with 1 cup of boiled water on the bottom shelf of the oven prior to adding the bread.
- Baking: Place the loaf on the middle shelf and bake for 20-25 minutes. The loaf should be a nice golden brown, sometimes a little dark, but this is ideal to get a good crust.
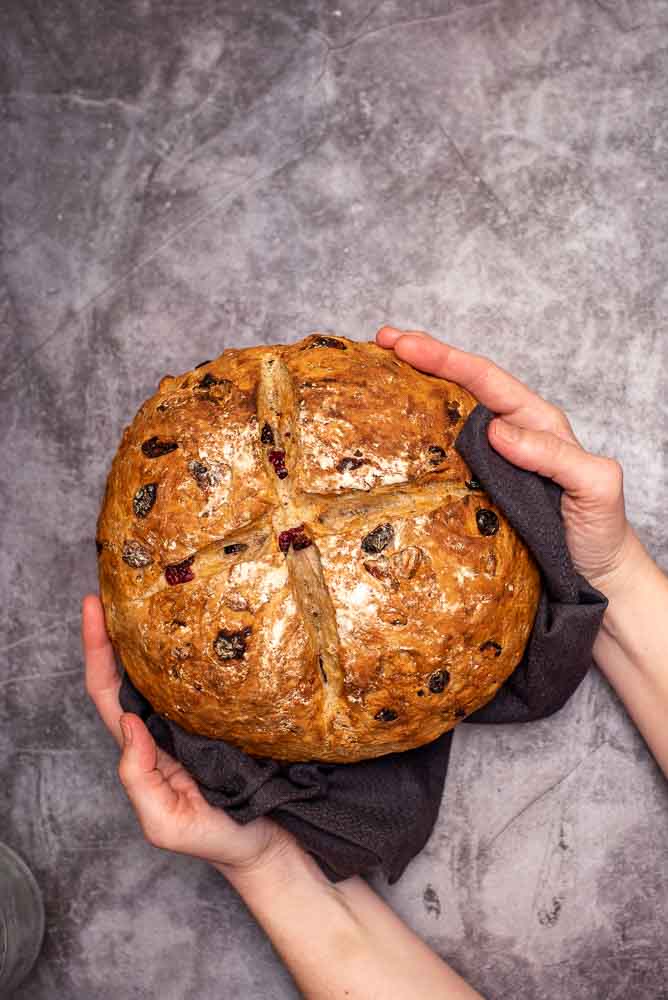
- Remove from the oven and leave to cool on a wire rack.
FROM MY KITCHEN TO YOURS
Made this recipe?
I would love to hear how it turned out. Leave a comment and add a star rating to help other home cooks discover the recipe.
A recipe worth keeping
Save this recipe for another day
Pin it to one of your boards and keep it close for the next time you are ready to cook or bake.
Save to PinterestKeep cooking
You may also like
 Recipe
Lemon Crinkle Cookies
Soft lemon crinkle cookies with snowy cracked tops and a bright, refreshing citrus flavour.
View recipe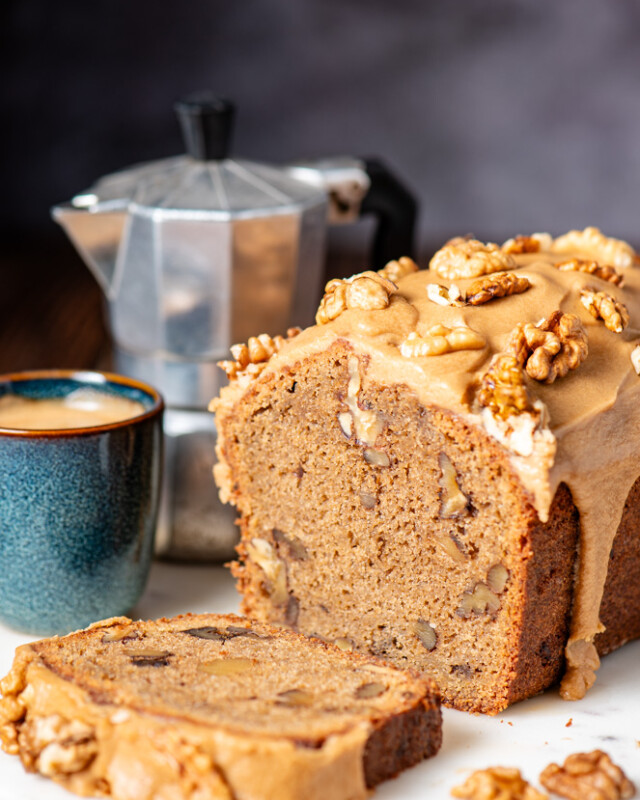 Recipe
Coffee & Walnut Loaf Cake
A moist coffee and walnut loaf cake finished with a smooth espresso and vanilla glaze.
View recipe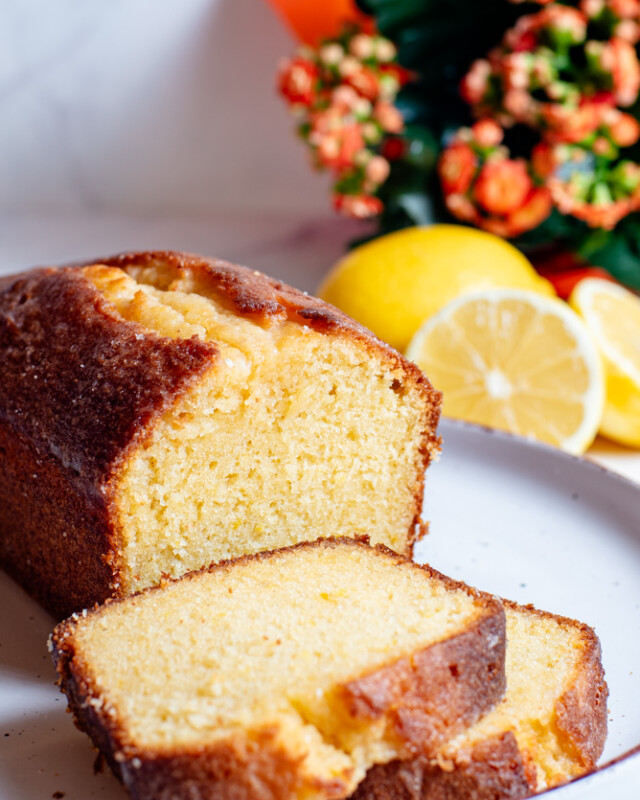 Recipe
Lemon Drizzle Cake
A moist buttery sponge soaked with bright lemon syrup and finished with a sweet citrus glaze.
View recipeAround the table
Questions and kitchen notes
Made this recipe? Leave a rating and tell me how it turned out. Your questions and tips may also help the next person making it.
I used dried cherries instead of cranberries. The bread is delicious toasted for breakfast. The dough was dry and even with 10 mins of kneading never got elastic. So it’s very dense crumb. But has a lovely taste.
Thank you for your feedback Mary. I decided to make it again today and found a similar issue, so I have slightly adjusted the recipe, which improved the texture and elasticity.