
From Nigel's Kitchen Table
Viennese Biscuits
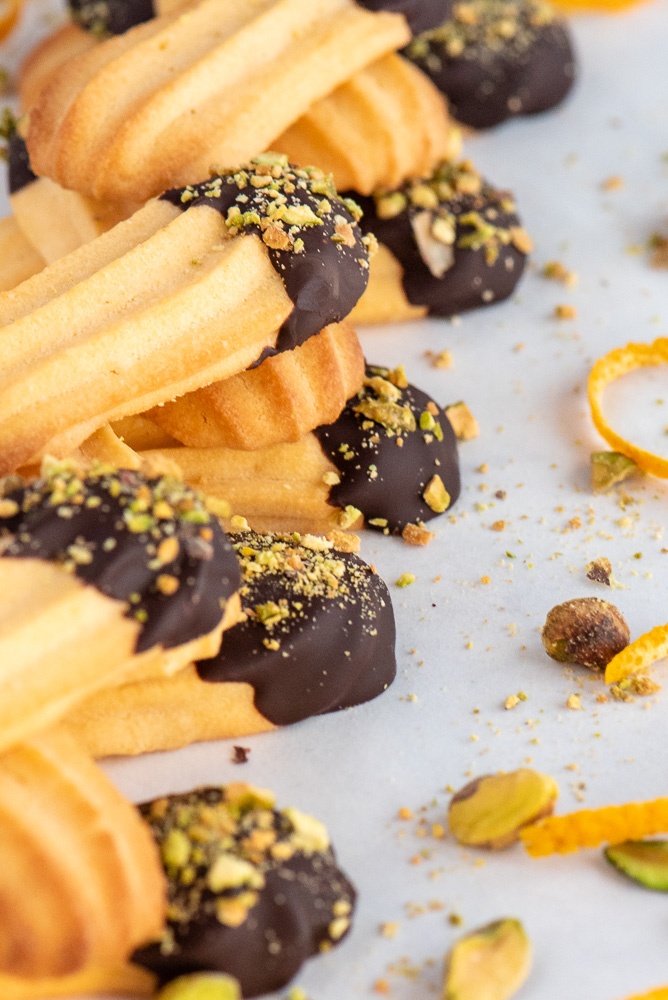
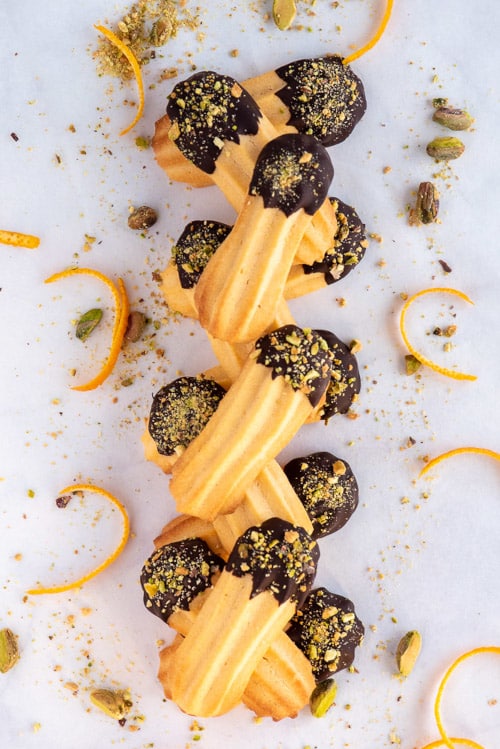
Delicate buttery Viennese biscuits dipped in dark chocolate and finished with pistachios.

Navigate the recipe
On this page
The recipe, step by step
These Viennese biscuits are wonderfully delicate and buttery, with fresh orange zest running through the biscuit and a rich chocolate and pistachio finish. They have a soft, melt-in-the-mouth crumb and look far more complicated than they actually are.
Even if piping biscuits is new to you, this is a very forgiving recipe. Once the dough is in the piping bag, you can make classic fingers, rosettes, circles or S-shapes. After baking, simply dip them in chocolate and scatter over crushed pistachios.
I particularly like the combination of orange, chocolate and pistachio here. The orange keeps the buttery biscuit fresh, while the chocolate adds richness and the pistachios give a little crunch. They are lovely alongside tea or coffee and also make a beautiful homemade edible gift.
For another delicate biscuit, try my Raspberry Pistachio Biscuits, Chocolate Linzer Biscuits or Chestnut Snowball Cookies.
Recipe Highlights
- Easy to make: The biscuit dough comes together quickly and doesn’t need rolling or cutting.
- Taste: Buttery vanilla biscuits flavoured with fresh orange, then dipped in chocolate and finished with pistachios.
- Texture: Delicate and tender with a melt-in-the-mouth crumb and a little crunch from the nuts.
- Serving: Perfect with tea or coffee or as part of a biscuit platter.
- Quantity: 26 biscuits.
- Preparation: 15 minutes.
- Baking: 10–12 minutes.
- Chilling: 30 minutes.
- Total: 57 minutes.
Why You’ll Love These Viennese Biscuits
There is something particularly satisfying about a piped biscuit. The ridges created by the star nozzle give the biscuits their characteristic appearance, but they also create beautifully crisp edges while the centres stay tender.
Adding egg yolks makes this version slightly richer and more delicate than a traditional egg-free Viennese biscuit. Meanwhile, the cornflour helps give the baked biscuits that lovely short, melt-in-the-mouth texture.
They are also very easy to adapt. Change the citrus, dip them in a different chocolate, add spices or sandwich two together with buttercream or jam.
Ingredients and Substitutions
- Butter: Use 125 g butter at room temperature. It needs to be properly softened so the dough is easy enough to pipe, but it should not be melted.
- Icing sugar: Use 100 g icing sugar (US powdered sugar). Its fine texture helps produce a smooth, delicate biscuit dough.
- Egg yolks: Use 5 medium egg yolks at room temperature. They add richness and help give the biscuits their tender texture.
- Vanilla: Add ½ teaspoon pure vanilla extract or ¼ teaspoon vanilla paste. Either works, although vanilla paste gives a particularly rich flavour.
- Fine sea salt: Add a pinch of fine sea salt to balance the sweetness and enhance the butter, vanilla, orange and chocolate.
- Orange: Use the finely grated zest of 1 whole orange. Avoid grating into the bitter white pith beneath the skin.
- Plain flour: Use 200 g plain or all-purpose flour to provide the main structure of the biscuits.
- Cornflour: Add 30 g cornflour, approximately 2 tablespoons. This contributes to the delicate, short texture.
Decoration
- Chocolate: Use 80 g dark or milk chocolate, chopped. Choose whichever you prefer for dipping the baked biscuits.
- Pistachios: Use 3 tablespoons whole roasted pistachios, crushed. Sprinkle them over the chocolate before it sets.
Nigel recommends
Ingredients I Recommend
Vanilla bean paste adds a rich, rounded vanilla flavour to the biscuit dough, while a good-quality chocolate is ideal for dipping the baked biscuits and creating that contrasting chocolate finish.
 Ingredient
Nielsen Massey
Vanilla Bean Paste
Rich vanilla bean paste with a concentrated vanilla flavour and visible vanilla seeds, ideal for cakes, biscuits, custards, creams and glazes.
 Ingredient
Some retailer links may be affiliate links. Recommendations remain editorially independent.

How to Make Viennese Biscuits
1. Prepare the baking tray: Line a baking tray with baking parchment or a silicone baking mat. Make sure the tray will fit into both your fridge and oven. Alternatively, cut the baking paper into smaller pieces so the piped biscuits can be transferred easily after chilling.
2. Cream the butter and sugar: Add the softened butter and icing sugar to a medium mixing bowl and beat together until light and fluffy.
3. Add the egg yolks: Add the egg yolks one at a time, beating well after each addition before adding the next.
4. Add the flavourings: Mix in the vanilla, fine sea salt and orange zest.
5. Add the dry ingredients: Add the plain flour and cornflour and mix until you have a smooth biscuit dough. Scrape down the sides of the bowl with a spatula as needed.
6. Fill the piping bag: Spoon the dough into a piping bag fitted with a large star nozzle.
7. Pipe the biscuits: Pipe approximately 5 cm / 2-inch fingers onto the prepared baking tray, leaving at least 1 cm between them.
Alternatively, pipe the dough into rosettes, circles or S-shapes.
8. Chill the biscuits: Place the piped biscuits in the fridge for at least 30 minutes. Chilling helps them retain the definition from the piping nozzle while they bake.
9. Preheat the oven: Heat the oven to 180°C fan / 400°F / Gas 6.
10. Bake: Place the tray on the middle shelf and bake for 10–12 minutes, until the biscuits are a pale golden-brown colour.
11. Cool: Leave the biscuits on the baking tray for 5 minutes, then carefully transfer them to a wire cooling rack and allow them to cool completely.
12. Melt the chocolate: Place the chopped chocolate in a medium heatproof bowl. Set it over a pan of gently simmering water, making sure the bottom of the bowl does not touch the water. Stir occasionally until completely smooth.
13. Dip the biscuits: Dip each cooled biscuit into the melted chocolate and place it back onto the lined baking tray.
14. Add the pistachios: Sprinkle the crushed roasted pistachios over the chocolate before it sets.

Variations
Lemon and Cardamom
Replace the orange zest with the zest of 1 lemon and add 2 teaspoons ground cardamom to the biscuit dough.
Cranberry and Tahini
Add 50 g finely chopped dried cranberries and 1 tablespoon tahini to the dough.
Walnut and Maple
Add 50 g chopped walnuts and 1 tablespoon maple syrup to the biscuit dough.
Two-Tone Viennese Biscuits
Divide the finished dough in half and add 1 tablespoon cocoa powder to one portion. Place the vanilla and chocolate dough alongside one another in the piping bag to create a two-tone effect.
Different Decorations
Instead of pistachios, try flaked almonds, crystallised orange, sprinkles or powdered freeze-dried raspberries.
Sandwich Biscuits
Pipe matching biscuits and sandwich them together once cooled with buttercream or jam. For a simple buttercream, the existing article suggests 100 g softened butter, 200 g icing sugar and a little vanilla.
Nigel’s Recipe Tips
Use Properly Softened Butter
The butter needs to be soft enough for the finished dough to pass comfortably through the piping nozzle. Cold butter will make the dough difficult to pipe, but melted or overly warm butter can cause the biscuits to spread.
Use a Large Piping Nozzle
The dough is fairly firm, so nozzle size makes a considerable difference. A large star nozzle with approximately a 1.5 cm opening works particularly well and creates the characteristic ridged appearance.
Chill Before Baking
Once piped, refrigerate the biscuits for at least 30 minutes. This firms the butter and helps the biscuits retain their piped shape rather than spreading too much in the oven.
Try Different Shapes
There is no need to make every biscuit into a straight finger. Pipe rosettes, S-shapes, circles or any shape that works comfortably with the dough.
Don’t Overbake Them
Viennese biscuits should remain quite pale. Begin checking them at 10 minutes and remove them once they are lightly golden around the edges.
Melt Chocolate Gently
When using the double-boiler method, choose a heatproof bowl that sits securely over the saucepan without touching the water. Keep the water at a gentle simmer and avoid allowing water or steam into the chocolate, as this can cause it to seize.
Let Them Cool Before Dipping
The biscuits are delicate while warm, so allow them to cool completely before dipping them into the melted chocolate.

Frequently Asked Questions
Why Is My Viennese Biscuit Dough Difficult to Pipe?
The most common reason is butter that is still too cold. The butter should be soft at room temperature before you begin. A sufficiently large piping nozzle also makes a significant difference.
What Size Piping Nozzle Should I Use?
A large star nozzle with an opening of approximately 1.5 cm works well. A very small nozzle will make the dough unnecessarily difficult to pipe.
Why Do the Biscuits Need Chilling?
Chilling firms the butter after piping so the ridges and overall shape are better preserved during baking. Give them at least 30 minutes in the fridge before they go into the oven.
Can I Make Them Without Orange?
Yes. Leave out the orange zest or replace it with lemon zest, another citrus zest or one of the flavour variations above.
Can I Use Milk Chocolate Instead of Dark Chocolate?
Yes. Both dark and milk chocolate work for dipping these biscuits.
Can I Sandwich Them Together?
Yes. Pipe matching biscuits and sandwich them together with buttercream or jam once completely cool.
Tools You’ll Need
- Baking tray
- Baking parchment or silicone baking mat
- Medium mixing bowl
- Electric hand whisk or stand mixer
- Rubber spatula
- Piping bag
- Large star piping nozzle, approximately 1.5 cm
- Wire cooling rack
- Small saucepan
- Heatproof bowl
- Digital kitchen scales
Storage and Freezing
Storing
These biscuits are at their best on the day they are baked, when the texture is particularly delicate.
Once completely cool and the chocolate has set, store them in an airtight container at room temperature for up to 3 days. They will gradually soften as they are stored.
Freezing
Allow the baked biscuits to cool completely before placing them in a freezer-safe bag or airtight container.
Freeze for up to 1 month.
Allow them to return completely to room temperature before serving.
Nutrition
Serving: one Viennese biscuit
Calories: 113.56 kcal · 6% DV
Total Fat: 6.33 g · 9% DV
Carbohydrates: 12.5 g · 5% DV
Sugars: 5.01 g · 6% DV
Protein: 1.76 g · 4% DV
Sodium: 6.5 mg · 0% DV
Fibre: 0.61 g · 2% DV
% Daily Values are based on a 2,000-calorie diet.
Nutrition information is provided as an estimate and may vary depending on the exact ingredients and portion size used.
Viennese Biscuits
- A baking tray (see equipment suggestions on blog page)
INGREDIENTS LIST
- 125 g butter (room temperature)
- 100 g icing sugar (US powdered sugar)
- 5 medium egg yolks (room temperature)
- ½ tsp pure vanilla extract or 1/4 tsp of vanilla paste
- 1 pinch fine sea salt
- 1 whole orange (zested)
- 200 g plain flour (all-purpose)
- 30 g cornflour (2 tablespoons)
Decoration
- 80 g dark or milk chocolate (chopped)
- 3 tbsp whole roasted pistachios (crushed)
Preparation
- Line a baking tray with baking parchment or a silicone mat. It is important that the tray you use will fit in the oven. Alternatively, cut your baking paper in half, so that when it comes to baking you can transfer them more easily.
- In a medium mixing bowl, mix together the butter and icing sugar until light and fluffy.
- Add the egg yolks, one at a time, until all 5 egg yolks have been incorporated.
- Mix in the vanilla extract, salt, orange zest, flour and cornflour until smooth. You may need to scrape down the sides of the bowl a couple of times with a rubber spatula.
- Spoon the dough into a piping bag fitted with a large star nozzle and pipe 5cm (2 inches) lengths onto the baking tray leaving at least 1cm between each one.Alternatively, you can pipe rosettes.
- Place the tray in the fridge for at least 30 minutes and then preheat the oven to 180°C fan / 400°F / Gas 6.
- Baking: Place the tray on the middle shelf of the oven for 10-12minutes and bake until the biscuits are a nice pale golden-brown colour.
- Cool on the baking tray for five minutes, then transfer to a wire rack.
- Once the biscuits have cooled, place the chopped chocolate in a medium-sized heatproof bowl. Melt the chocolate (or in the microwave for a few seconds) over a pan of gently simmering water, stirring occasionally. *See notes.
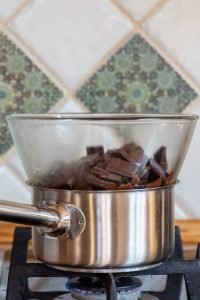
- Once smooth and completely melted, dip the biscuits one at a time and place them back onto the baking tray. Then sprinkle with the crushed pistachios.
Notes & Tips
- Piping nozzle size – is quite important. The biscuit dough is fairly firm, and you will want to use a large nozzle. I use a star shape, which has a 1.5cm opening which works well for me.
- Make different shapes – you don’t have to stick to long finger shapes. Pipe S shapes or circles.
- Melting chocolate – this method is called the double boiler method and it is super easy if you follow these tips: 1. Choose a saucepan that is not too big and a heatproof bowl that fits snuggly on top. 2. Fill the saucepan with enough water that it will not run dry while boiling. 3. Make sure there is a gap between the bowl and the water, they must not touch. 4. Keep the water to a simmer only. No water or steam must go inside the bowl with the chocolate, or it will seize up.
FROM MY KITCHEN TO YOURS
Made this recipe?
I would love to hear how it turned out. Leave a comment and add a star rating to help other home cooks discover the recipe.

A recipe worth keeping
Save this recipe for another day
Pin it to one of your boards and keep it close for the next time you are ready to cook or bake.
Save to PinterestKeep cooking
You may also like
 Recipe
Chocolate Chia Pudding
A creamy vegan chocolate chia pudding topped with rich hazelnut fudge sauce for a simple, satisfying dessert or breakfast.
View recipe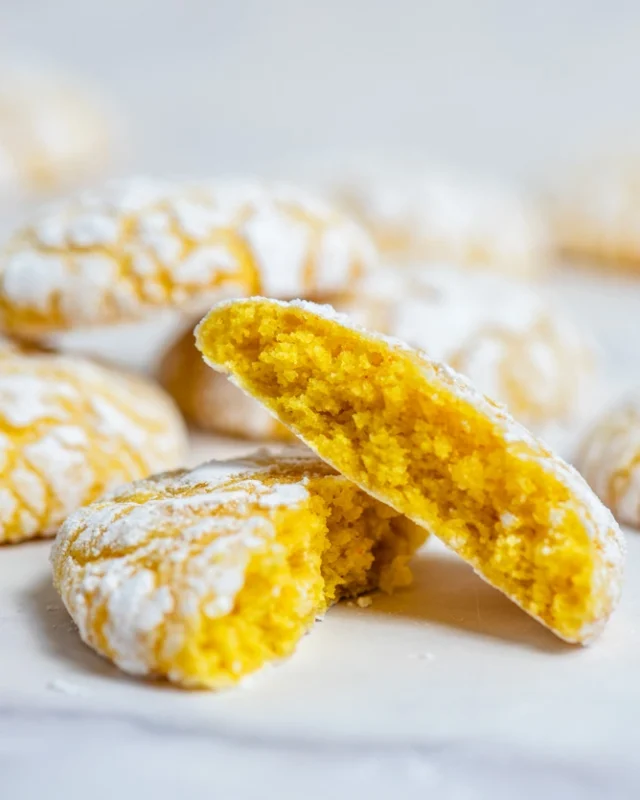 Recipe
Lemon Crinkle Cookies
Soft lemon crinkle cookies with snowy cracked tops and a bright, refreshing citrus flavour.
View recipe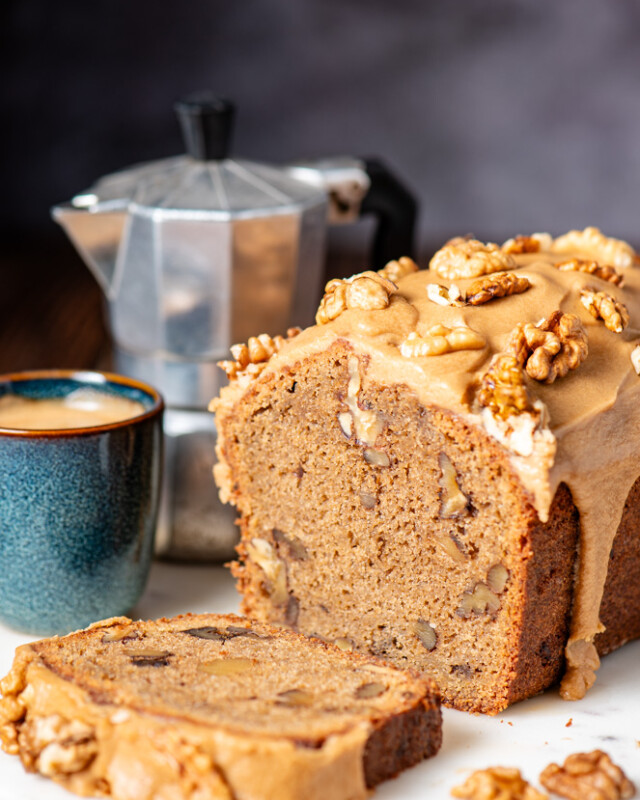 Recipe
Coffee & Walnut Loaf Cake
A moist coffee and walnut loaf cake finished with a smooth espresso and vanilla glaze.
View recipe
Around the table
Questions and kitchen notes
Made this recipe? Leave a rating and tell me how it turned out. Your questions and tips may also help the next person making it.