
From Nigel's Kitchen Table
Pastel de Nata – Portuguese Custard Tarts
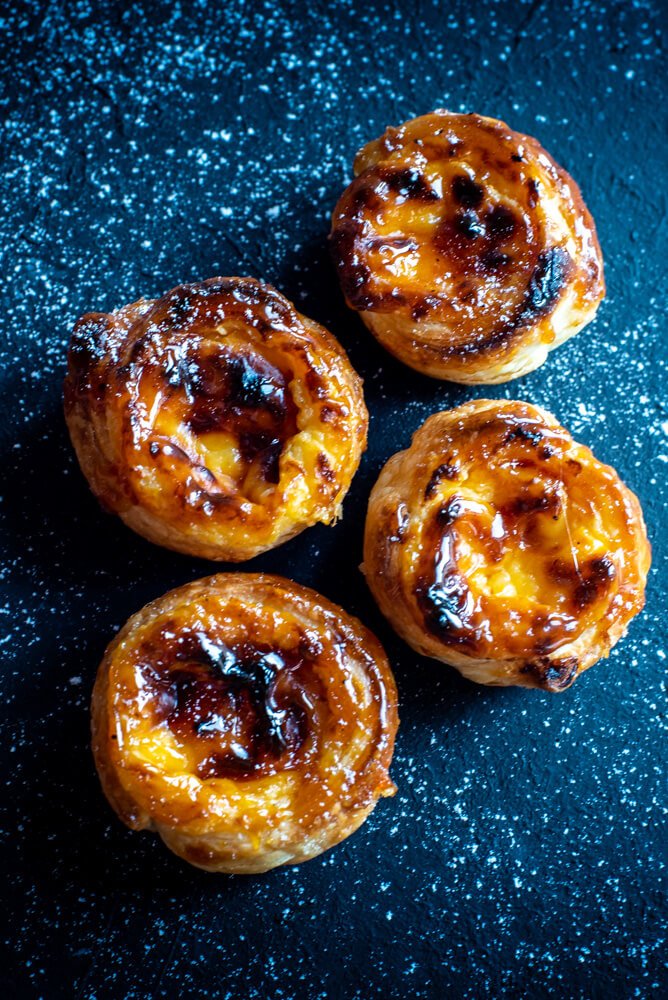
Crisp puff pastry shells filled with creamy, caramelised Portuguese custard—classic pastel de nata that are simpler to make than they look.
Navigate the recipe
On this page
The recipe, step by step
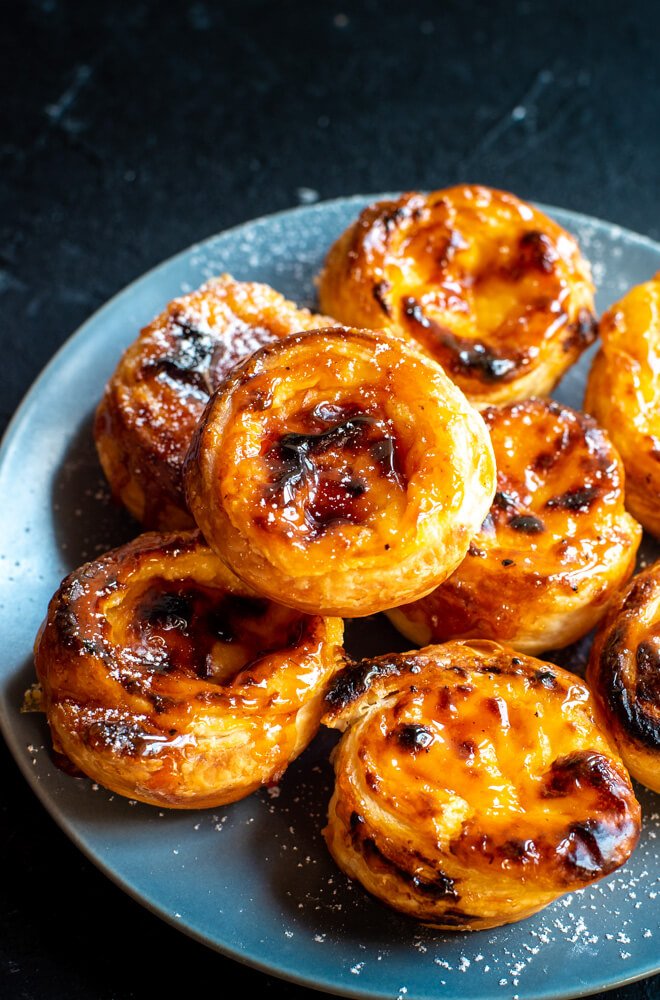
I have always had a soft spot for custard, and pastel de nata are one of the finest ways to enjoy it. Crisp, buttery pastry holds a smooth egg custard topped with dark caramelised patches. They look rather special but are far more manageable to make at home than many people expect.
These little Portuguese custard tarts are closely associated with Lisbon, with a history commonly linked to eighteenth-century monastic baking. What I love most is the contrast between the flaky pastry and softly set custard, gently flavoured with lemon, cinnamon and vanilla. A final brush of caramel syrup makes them even more indulgent.
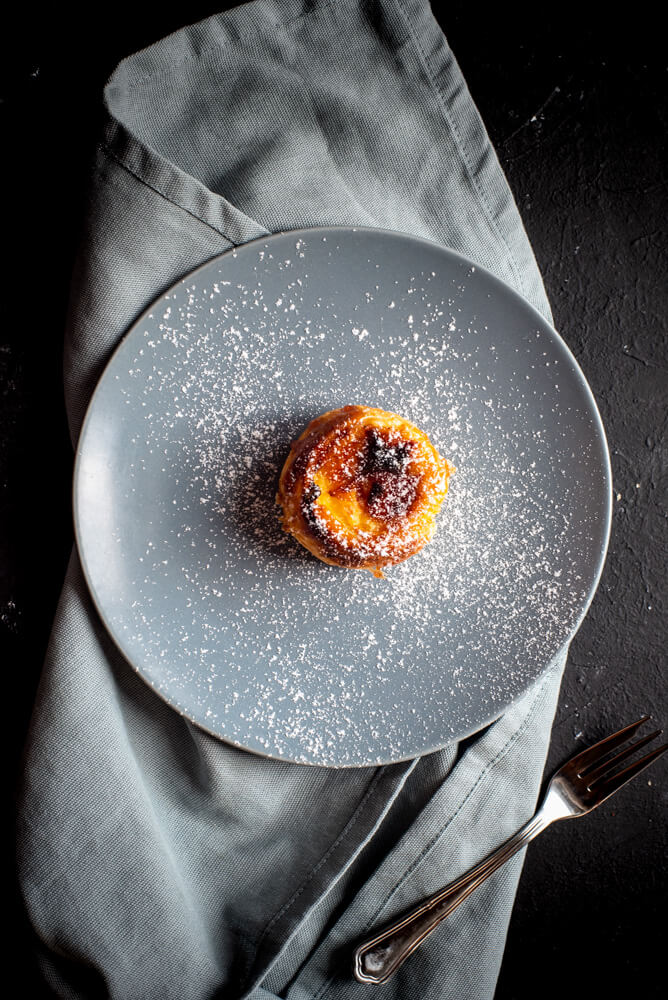
Serve them slightly warm, while the pastry is still crisp and the custard soft and creamy.
I use ready-made puff pastry to keep this recipe practical. When I have more time, I make my own flaky pastry, which produces excellent layers without all the work involved in traditional puff pastry.
Why You’ll Love These Pastel de Nata
- Crisp, buttery pastry with creamy custard
- Flavoured with lemon, cinnamon and vanilla
- Made with convenient ready-made puff pastry
- Finished with dark caramelised patches
- Easier to prepare than they look
- Makes a small batch of ten tarts
- Best served slightly warm
Recipe Highlights
- Ease: Straightforward, with ready-made pastry keeping the preparation manageable.
- Taste and texture: Crisp, flaky pastry filled with smooth lemon, cinnamon and vanilla custard, finished with caramel syrup.
- Serving suggestion: Serve slightly warm while the pastry is still crisp.
- Quantity: Ten Portuguese custard tarts.
- Time: Approximately 47 minutes, including 30 minutes of preparation, 15 minutes of baking and 2 minutes under the grill.
Ingredients for Pastel de Nata
The complete quantities are provided in the recipe card below. The recipe is made in three parts: custard, caramel syrup and pastry.
Custard Ingredients
- Milk: Use 180 ml of milk to form the base of the custard and give it a light, creamy consistency.
- Double or heavy cream: Use 120 ml for richness and a smooth, luxurious texture.
- Lemon rind: Use the rind from half an unwaxed lemon. The rind infuses directly in the milk and cream, so avoid waxed fruit.
- Vanilla: Use 1 teaspoon of pure vanilla extract or ½ teaspoon of vanilla paste to round out the flavour of the custard.
- Cinnamon stick: Gently infuses the custard with warmth without leaving ground cinnamon throughout the mixture.
- Butter: Use 20 g to enrich the custard and give it a smooth finish.
- Egg yolks: Three medium egg yolks provide richness, colour and help the custard set.
- Caster sugar: Use 80 g to sweeten the custard.
- Cornflour: Two tablespoons thicken the custard without making it overly heavy.
- Fine sea salt: One pinch balances the sweetness and enhances the lemon, cinnamon and vanilla.
Nigel Recommends
Don’t Skip the Salt
I highly recommend adding a generous pinch of fine sea salt to sweet recipes. It balances sweetness and richness while helping flavours such as chocolate, vanilla and caramel stand out more clearly. Although it may seem contradictory, a little salt can also make a dessert taste sweeter by softening bitterness and creating a better balance between the different flavours. The key is to add just enough to enhance the recipe without making it taste salty.
Caramel Syrup Ingredients
- Caster sugar: Use 80 g to make the light caramel.
- Water: Use 40 ml to turn the caramelised sugar into a brushable syrup.
Pastry
- Ready-made puff pastry: Use 275 g and keep it chilled until shaping. Cool pastry is easier to handle and produces cleaner, flakier layers.

How to Make Pastel de Nata
1. Infuse the milk and cream: Place the milk, cream, lemon rind, cinnamon stick and butter in a saucepan. Heat gently until the mixture is almost boiling.
2. Prepare the egg mixture: Place the egg yolks, 80 g caster sugar, fine sea salt and cornflour in a large mixing bowl, then whisk until smooth.
3. Combine the custard: Gradually pour the warm milk mixture over the egg yolk mixture while whisking continuously.
4. Strain the custard: Pour the mixture through a fine sieve and return it to the saucepan.
5. Thicken the custard: Cook gently for 3–4 minutes, stirring continuously, until it reaches the consistency of double cream. Do not allow it to become excessively thick.
6. Cool the custard: Remove the saucepan from the heat and press heat-resistant cling film directly onto the surface of the custard to prevent a skin from forming. Leave it to cool.
7. Prepare the oven and tin: Preheat the oven to 220°C / 200°C fan / 425°F / Gas 7. Lightly grease a standard muffin tin.
8. Roll the pastry: Roll the pastry sheet tightly into a log approximately 2.5 cm thick.
9. Divide the pastry: Cut the pastry log into ten slices, each approximately 1.5 cm wide.
10. Shape the pastry shells: Place one pastry slice into each prepared muffin-tin hole. Dampen your fingers with cold water, then press the pastry evenly across the base and up the sides.
11. Use the alternative pastry method, if preferred: Cut ten discs from ready-rolled puff pastry and press them into the greased muffin tin.
12. Fill the pastry shells: Divide the cooled custard between the pastry cases, taking care not to overfill them.
13. Bake the tarts: Place the muffin tin on the middle shelf of the oven and bake for 15 minutes.
14. Begin the caramel syrup: Place 80 g caster sugar in a heavy-based saucepan and cook over medium heat for approximately 5 minutes, until it forms a light caramel.
15. Add the water carefully: Remove the saucepan from the heat and carefully add 40 ml of water. The caramel may bubble and spit, so keep your hands and face away from the pan.
16. Finish the syrup: Return the saucepan to a low heat and stir until the hardened caramel has dissolved into a smooth syrup.
17. Caramelise the custard: After the tarts have baked for 15 minutes, switch the oven to its grill setting and move the tin to the top shelf.
18. Grill the tarts: Grill for approximately 2 minutes, watching them continuously, until the custard develops dark caramelised patches.
19. Add the caramel syrup: Remove the tarts from the oven and brush the tops lightly with the prepared caramel syrup.
20. Cool the tarts: Leave them in the muffin tin for a few minutes before carefully transferring them to a wire cooling rack.
21. Serve: Serve the pastel de nata slightly warm while the pastry is still crisp.
Tips for the Best Pastel de Nata
Cool the Custard Before Filling
Warm custard can soften the pastry before it reaches the oven. Press cling film directly against the surface while the custard cools to prevent a skin from forming.
Do Not Over-Thicken the Custard
Remove the custard from the heat when it reaches the consistency of double cream. It will continue to thicken as it cools and will set further while baking.
Keep the Pastry Cold
Cold puff pastry is easier to shape and produces cleaner, flakier layers. If it becomes soft while you are working, place the prepared muffin tin in the refrigerator briefly before filling the pastry cases.
Use Damp Fingers
A little cold water prevents the pastry from sticking to your fingers and makes it easier to press evenly into the muffin tin. Avoid using too much water, as wet pastry may become sticky.
Do Not Overfill the Cases
Leave a little space at the top of each pastry shell because the custard may rise slightly as it bakes.
Watch the Grill Carefully
The custard can go from golden to burnt very quickly. Two minutes is sufficient in my oven, but grill strengths vary, so watch the tarts continuously.
Be Careful When Making Caramel
Caramelised sugar becomes extremely hot and can cause serious burns. Adding water may cause the mixture to spit and bubble vigorously, so remove the pan from the heat first and pour carefully.
Allow Them to Cool Slightly
The custard will be extremely hot when the tarts first leave the oven. Let them rest for a few minutes before eating, even when you plan to serve them warm.
Pastel de Nata Variations
Berry Custard Tarts
Place a few blueberries or raspberries in each pastry shell before adding the custard. Keep the quantity modest, as too much fruit may release excess liquid and soften the pastry.
Chocolate Custard Tarts
Add a few dark chocolate chips beneath the custard for a richer variation. Avoid adding too many, as the cases still need enough room for the custard.
Add a Cinnamon Finish
Dust the warm tarts lightly with ground cinnamon before serving. Add Icing Sugar A light dusting of icing sugar gives the tarts a simple traditional-style finish.
How to Store Pastel de Nata
Pastel de nata are at their best on the day they are made, while the pastry remains crisp and the custard is slightly warm. Once completely cool, place them in an airtight container and refrigerate for up to three days. The pastry will gradually soften during storage.
How to Reheat Pastel de Nata
Warm the tarts briefly in the oven to refresh the pastry. Allow them to stand for a few minutes before eating because the custard heats much more quickly than the pastry and may be extremely hot.
Can You Freeze Pastel de Nata?
The tarts can be frozen, but both the custard and pastry may lose some of their original texture. For the crispest pastry and smoothest custard, I recommend serving them freshly baked.
Nutrition
Serving: One Portuguese custard tart.

Nutritional information is provided as a guide only. Values may vary depending on the exact ingredients, brands and serving sizes used.
Tools You’ll Need
- Standard muffin tin
- Medium saucepan
- Heavy-based saucepan
- Large mixing bowl
- Whisk
- Fine sieve
- Rolling pin
- Sharp knife or pastry cutter
- Heat-resistant cling film
- Pastry brush
- Wire cooling rack
Frequently Asked Questions
Do I Need a Special Pastel de Nata Tin?
No. A standard muffin tin works well in an ordinary home kitchen. Traditional tins may create a slightly different shape, but they are not essential for this recipe.
Can I Use Ready-Rolled Puff Pastry?
Yes. Roll it into a tight log and cut it into ten slices, or cut out ten pastry discs and press them into the muffin tin.
Why Is My Custard Lumpy?
The heat may have been too high, or the mixture may not have been stirred continuously. Whisk the warm milk into the egg mixture gradually and sieve everything before returning it to the saucepan.
Why Did My Custard Become Too Thick?
The mixture may have been cooked for too long. Remove it from the heat when it resembles double cream, as it continues thickening as it cools and bakes.
Why Did My Pastry Turn Soft?
The custard may have been warm when added, the pastry may have become too soft before baking or the tarts may have been refrigerated for some time. Cool the custard fully and keep the pastry chilled until the cases are ready to fill.
How Do I Get the Dark Patches on Top?
Bake the tarts first, then place them briefly beneath a hot grill. Watch them continuously because the custard caramelises very quickly.
Can I Make the Custard in Advance?
Yes. Prepare the custard, cover its surface directly with heat-resistant cling film and refrigerate it once cool. Bring it back to a workable consistency before filling the chilled pastry shells.
Are Pastel de Nata Served Warm or Cold?
They are particularly delicious served slightly warm, when the pastry is crisp and the custard is soft. They can also be eaten at room temperature or chilled.
Use an unwaxed lemon because the rind infuses directly in the milk and cream. Cornflour thickens the custard without making it heavy, while the cinnamon and salt round out the sweetness. Keep the pastry chilled until shaping; cool pastry is easier to handle and bakes more cleanly.
Pastel de Nata (Custard Tarts)
- 1 Muffin tin see suggested equipment
INGREDIENTS LIST
For the custard
- 180 ml milk
- 120 ml double or heavy cream
- 1/2 of an unwaxed lemon (rind)
- 1 tsp pure vanilla extract or 1/2 tsp of vanilla paste
- 1 stick cinnamon
- 20 g butter
- 3 medium egg yolks
- 80 g caster sugar
- 2 tbsp cornflour (cornstarch)
- 1 pinch fine sea salt
For the caramel syrup
- 80 g caster sugar
- 40 ml water
For the pastry
- 275 g readymade puff pastry
Preparation
- Custard: Place the milk, cream, lemon rind, cinnamon stick and butter into a sauce pan and heat until almost boiling.
- In a large bowl, whisk the egg yolks, sugar, salt and cornflour together to form a paste.
- Pour the warm milk mixture over the flour paste and then sieve the whole mixture back into the pan, heat gently and keep stirring for 3-4 mins until it reaches the consistency of double cream. Remove from the heat and cover the surface with heat resistant clingfilm to cool.
- Pastry shells: There are two methods for making pastry shells. The traditional way which I use is to roll the pastry sheet into a log about 2.5 cm thick. Then cut 10 x 1.5 cm slices. Place a piece into a greased muffin tin and wet your fingers with cold water. Work the discs into the tins with your fingers, pressing and stretching them to fill the tins.
- The second method that can be used is to cut out 10 discs from the pre-rolled pastry. Work the discs into the tins with your fingers as with the first method.
- Heat oven to 200°C fan / 425°F / Gas 7.
- Baking: Once all the pastry shells are ready to fill with the custard mix and place in the middle of the oven for 15 minutes.
- Caramel syrup: Put 80 g granulated sugar in a heavy pan and stir over medium heat for 5 mins until you have a light caramel. Take the pan off the heat and carefully pour in 40 ml water. Return the pan to low heat until the sugar has melted again into syrup.
- After 15 mins, turn the oven onto its grill setting and transfer the tarts to the top shelf. Grill for 2 mins until they begin to caramelise. Remove from the oven and brush with a little of the caramel.
- Let the tarts cool slightly in the moulds before turning out onto a cooling rack.
FROM MY KITCHEN TO YOURS
Made this recipe?
I would love to hear how it turned out. Leave a comment and add a star rating to help other home cooks discover the recipe.

A recipe worth keeping
Save this recipe for another day
Pin it to one of your boards and keep it close for the next time you are ready to cook or bake.
Save to PinterestKeep cooking
You may also like
 Recipe
Chocolate Chia Pudding
A creamy vegan chocolate chia pudding topped with rich hazelnut fudge sauce for a simple, satisfying dessert or breakfast.
View recipe Recipe
Lemon Crinkle Cookies
Soft lemon crinkle cookies with snowy cracked tops and a bright, refreshing citrus flavour.
View recipe Recipe
Coffee & Walnut Loaf Cake
A moist coffee and walnut loaf cake finished with a smooth espresso and vanilla glaze.
View recipe
Around the table
Questions and kitchen notes
Made this recipe? Leave a rating and tell me how it turned out. Your questions and tips may also help the next person making it.