
From Nigel's Kitchen Table
Chocolate Fudge Cake
A moist chocolate fudge cake with a light crumb and rich fudgy buttercream, ideal for birthdays and celebrations.

Navigate the recipe
On this page
The recipe, step by step
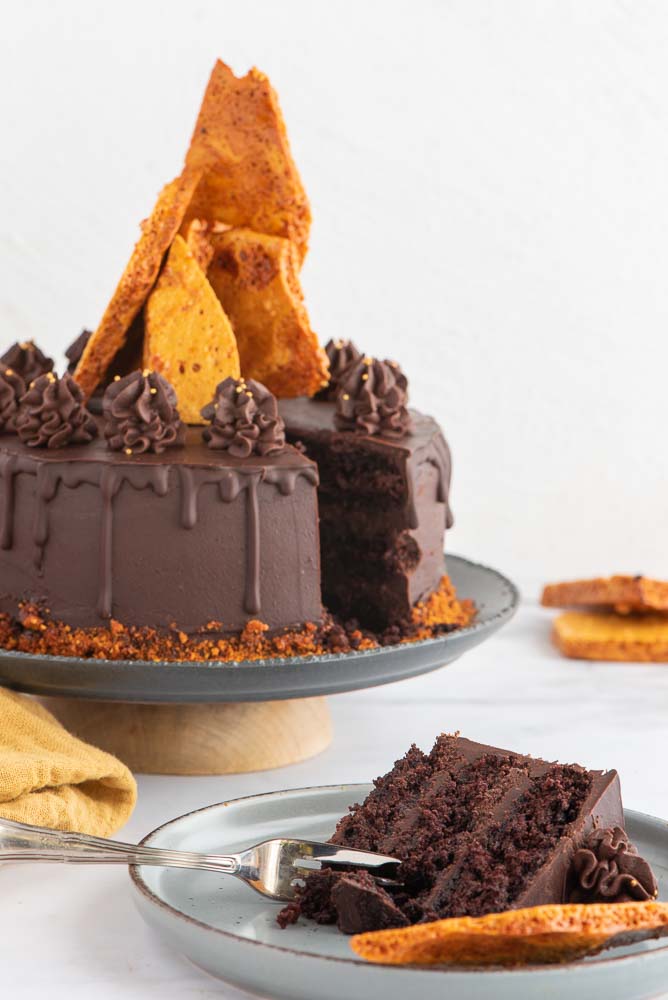
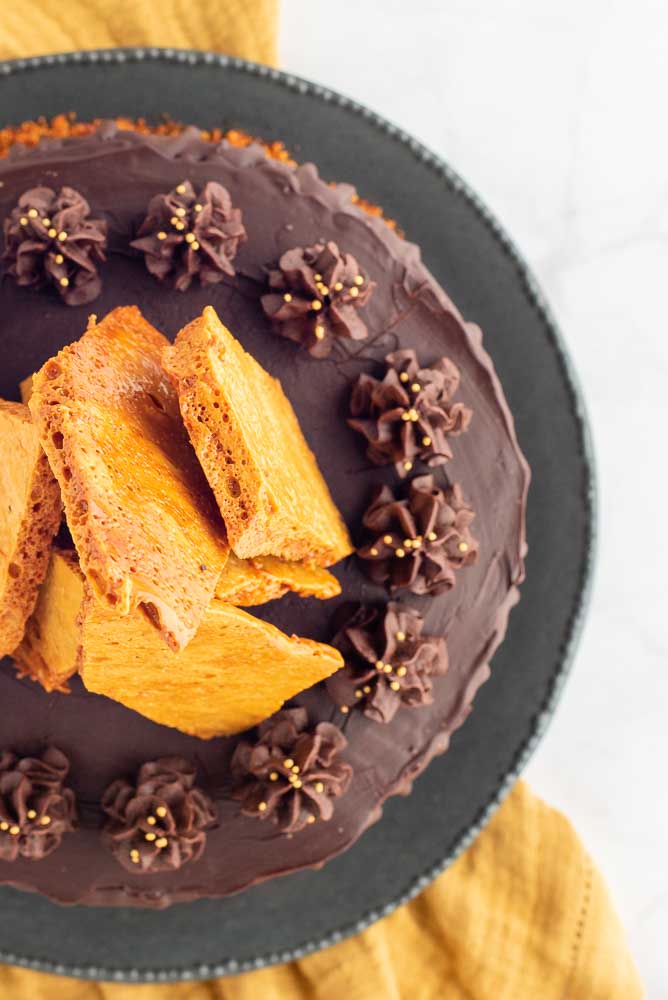
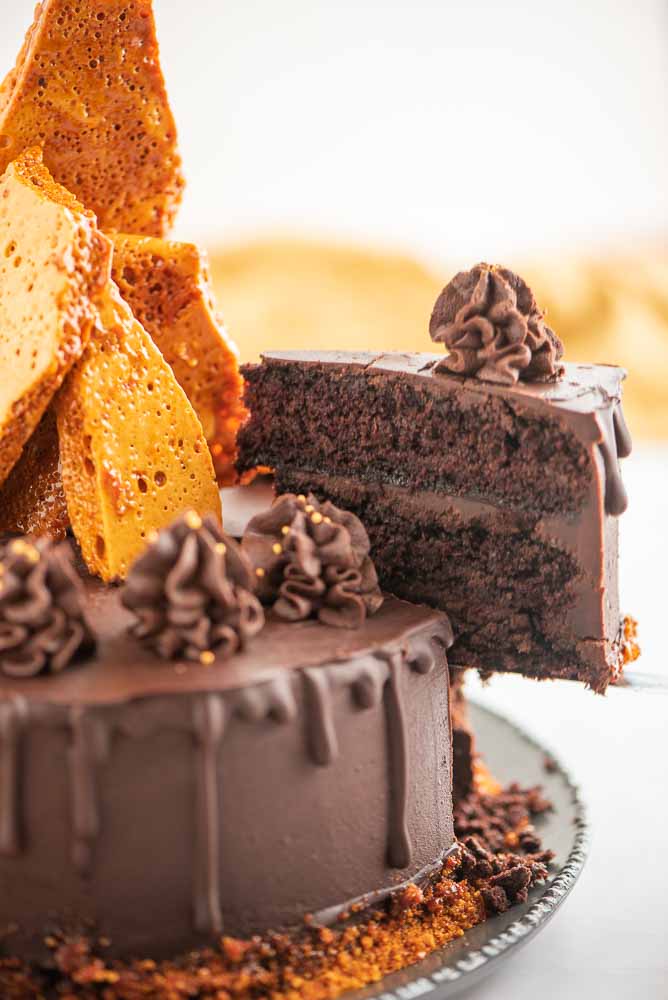
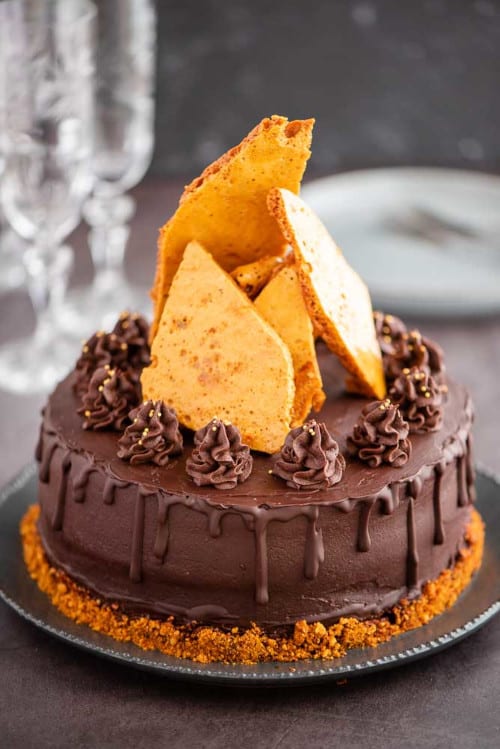
This chocolate fudge cake combines three moist chocolate sponge layers with a rich, creamy chocolate fudge buttercream. Finished with a glossy chocolate drip and crisp honeycomb shards, it is an impressive celebration cake that is surprisingly easy to make.
I originally made this cake for my father-in-law’s 80th birthday, and let’s just say it was a great success. Everyone loved the moist chocolate cake layers and rich, fudgy buttercream, while the honeycomb shards gave it that extra wow factor.
I’m certainly not a professional cake maker, but this chocolate fudge cake is much easier and quicker to prepare than it looks. It makes a wonderful birthday cake, but I would happily recommend it for any celebration—or simply whenever you feel like making something special.
Why You’ll Love This Chocolate Fudge Cake
- Can be prepared in stages
- Moist and tender chocolate sponge layers
- Rich chocolate fudge buttercream
- Impressive yet straightforward to make
- Decorated with a simple chocolate drip
- Finished with crisp homemade honeycomb
- Perfect for birthdays and other celebrations
Recipe Highlights
- Ease: Easy.
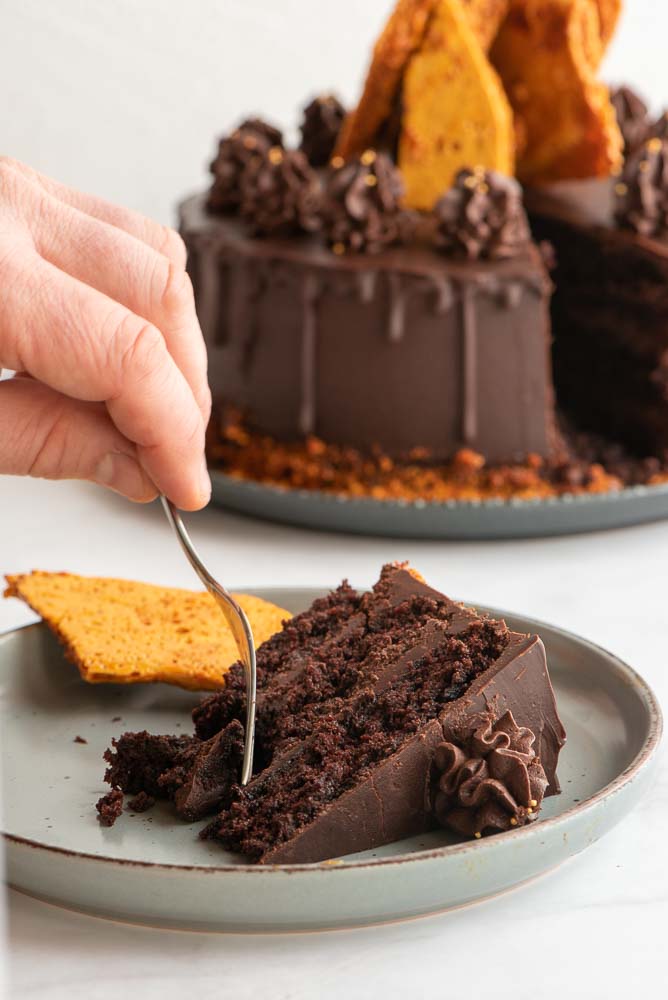
- Taste and texture: Moist chocolate sponge layers with rich chocolate fudge buttercream and crisp honeycomb shards.
- Serving suggestion: Delicious on its own or served with a little whipped cream.
- Quantity: Approximately 16 slices. Make it as a three-layer 20cm (8-inch) cake or a two-layer 24cm (9½-inch) sandwich cake.
- Time: Approximately 45 minutes, plus 1 hour of chilling.
Ingredients
- Plain or all-purpose flour – Provides the structure of the chocolate sponge.
- Cocoa powder – Adds a rich chocolate flavour and contributes to the cake’s structure. I prefer to use unsweetened natural cocoa powder because its acidity reacts with the bicarbonate of soda, helping the cake rise.
Cocoa recommendations: Dr. Oetker fine dark cocoa powder or not as dark – Sevenhills wholefoods organic cacao powder
- Soft light brown or light muscovado sugar – Adds sweetness, moisture and a subtle caramel flavour.
- Caster sugar – Provides sweetness and helps create a lighter cake structure.
- Bicarbonate of soda or baking soda – Reacts with acidic ingredients in the batter, including the cocoa and vinegar, to help the cake rise.
- Baking powder – Provides additional lift during baking, creating light and tender sponge layers.
- Neutral-flavoured oil – Sunflower or vegetable oil keeps the chocolate cake wonderfully moist. Unlike butter, oil does not become firm when the cake is chilled.
- Eggs – Provide structure, richness and flavour. Use room-temperature eggs for the best results.
- Milk or a plant-based alternative – Adds moisture and flavour to the cake. Buttermilk can also be used.
- Hot water or coffee – Blooms the cocoa powder, intensifying its flavour and helping it blend smoothly into the batter. Coffee enhances the chocolate without making the finished cake taste strongly of coffee.
- White vinegar – Reacts with the bicarbonate of soda to help produce a light, airy texture. Apple cider vinegar can also be used. Check the acidity level on the bottle, as this can vary between products.
- Dark chocolate – Used to make the rich chocolate fudge buttercream and the decorative chocolate drip.
Chocolate recommendations: bars – Lindt Excellence dark 70% bar 100g, Montezuma’s darkside 51% bar 90g, Menier dark cooking chocolate 100g, Green and Black’s Organic dark Chocolate 100g, 1kg bags – Callebaut dark chocolate, Callebaut milk chocolate, Callebaut white chocolate.
- Icing sugar – Its fine texture produces a smooth buttercream without a gritty finish.
- Milk or cream – Loosens the buttercream, making it smoother and easier to spread over the cake.
- Honeycomb – Adds crunch, height and a dramatic finishing touch to the decorated cake.
- Salt – Dont forget the salt – I highly recommend adding a generous pinch of salt to chocolate cakes. It may sound unusual, but salt helps balance the chocolate’s natural bitterness while enhancing its sweetness and richness. You should not be able to taste the salt itself. Instead, it makes the other flavours more pronounced and gives the cake greater depth. Don’t be afraid to add a little—it can make a noticeable difference to the finished cake.
I recommend Maldon Sea salt flakes or Cornish sea salt, but any good quality sea salt is fine.
Variations
Try Flavoured Chocolate
Flavoured chocolate can add an unexpected twist to the buttercream. Orange and raspberry chocolate are two of my favourites, as both work beautifully with the rich chocolate sponge.
Flavour recommendations: Lindt Excellence dark orange or Raspberry chocolate bar
You could also try:
- Mint chocolate
- Salted caramel chocolate
- Coffee-flavoured chocolate
- Hazelnut chocolate
Leave Out the Honeycomb
The honeycomb creates a wonderful centrepiece, but the cake will still be delicious without it. Decorate the top with chocolate curls, fresh berries, chopped nuts or your favourite chocolates instead.
Make a Two-Layer Cake
For a wider, slightly shorter cake, divide the mixture between two 24 cm (9½-inch) sandwich tins rather than three 20 cm (8-inch) tins. Keep an eye on the cakes as the baking time may need to be adjusted.
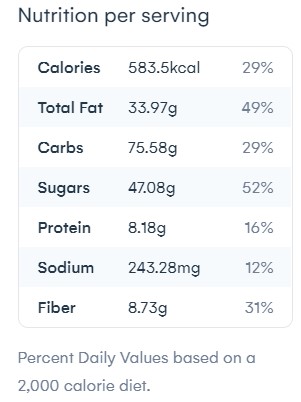
Nutrition
Serving: one slice (16 slices, without honeycomb)
Nutrition information is provided as an estimate and may vary depending on the ingredients, decorations and portion sizes used.
Storage and Freezing
Store the cake in an airtight container in the refrigerator for up to five days—if it lasts that long!
For the best flavour and texture, remove the cake from the fridge before serving and allow it to come closer to room temperature. This will soften the buttercream and make the chocolate sponge taste even richer.
Honeycomb gradually softens when exposed to moisture, so add it shortly before serving whenever possible.
Preparing the Cake in Advance
One of the advantages of this chocolate fudge cake is that its different components can be prepared separately.
Chocolate Cake Layers
Bake the sponge layers and allow them to cool completely. Wrap each layer individually and store them in the refrigerator for up to two days. The unfrosted cakes can also be frozen for up to two months.
Chocolate Fudge Buttercream
The chocolate fudge buttercream can be prepared two to three days in advance and stored in an airtight container in the refrigerator. Before assembling the cake, bring the buttercream to room temperature and beat it with an electric hand whisk until smooth, light and creamy.
Honeycomb
Make the honeycomb the day before or on the day you plan to serve the cake. Store it in a completely airtight container at room temperature to help it remain crisp. Avoid storing honeycomb in the refrigerator, where moisture can make it sticky and soft.
Can You Freeze Chocolate Fudge Cake?
Yes, both the cake layers and the completed frosted cake can be frozen for up to two months.
Wrap unfrosted sponge layers individually before freezing. For a decorated cake, chill it first so the buttercream becomes firm, then wrap it carefully or place it inside a suitable freezer-safe container.
Defrost the cake overnight in the refrigerator, then allow it to come to room temperature before serving.
For the best texture, freeze the cake without the honeycomb and add fresh honeycomb after defrosting.
Tools You’ll Need
Here is some of the kitchen equipment I use and recommend for making this chocolate fudge cake:
- Sugar thermometer and saucepan for the honeycomb
- Three 20 cm (8-inch) cake tins or two 24 cm (9½-inch) sandwich tins
- 20cm Springform pan – These springform pans make removing cakes from them after baking a doddle. I personally tend to line them as often as possible to ensure that my cakes don’t break for added security.
- Baking paper
- Large mixing bowls
- Electric hand whisk or stand mixer
- Electric hand whisk – I recommend the Breville Classic Combo Stand and Hand Mixer because it includes a generous 3.7-litre stainless steel bowl and a convenient stand, so you do not have to hold the mixer throughout use. You can find it and more of my favourite baking equipment in my Amazon Kitchen Equipment collection.
- Fine-mesh sieve
- Measuring jug
- Silicone spatula – I recommend these sturdy silicone spatulas because they are incredibly useful for baking and everyday cooking. Their firm handles make them excellent for scraping mixtures from bowls, dishes and frying pans, while the raised centre of the larger spatula gives it extra strength. You can find them and more of my favourite baking equipment in my Amazon Cake Making collection.
- Wire cooling rack
- Cake board or serving plate
- Palette knife
- Cake scraper
- Piping bag or small jug for the chocolate drip
Tips for the Best Chocolate Fudge Cake
Use Room-Temperature Ingredients
Room-temperature ingredients combine more smoothly and help create an even cake batter. Remove the eggs and milk from the refrigerator an hour or two before baking. The ingredients should be at room temperature rather than warm.
Line the Cake Tins
Grease the tins lightly and line their bases with baking paper. This makes it much easier to remove the delicate chocolate sponge layers without damaging them. You can also add strips of baking paper around the sides if your tins tend to stick.
Measure the Flour and Cocoa Carefully
Adding too much flour or cocoa powder can make the cake dry. For the most accurate results, weigh the ingredients with digital kitchen scales. When using measuring cups, spoon the flour into the cup and level it rather than packing it down.
Sift the Dry Ingredients
Cocoa powder and bicarbonate of soda can form small lumps. Sifting the dry ingredients ensures they are distributed evenly throughout the batter.
Bloom the Cocoa
Adding hot water or hot coffee helps release the cocoa powder’s flavour and creates a smoother, more intensely chocolatey batter. The finished mixture may appear quite loose, but this is normal and helps create a moist cake.
Don’t Overmix the Batter
Once the wet and dry ingredients have been combined, mix only until no visible streaks of flour remain. Overmixing develops the gluten in the flour and can result in a denser, tougher sponge.
Divide the Batter Evenly
For even cake layers, weigh the filled mixing bowl, subtract the bowl’s empty weight and divide the remaining amount equally between the tins. This makes the finished cake easier to stack and decorate.
Avoid Overbaking
Check the cakes towards the end of the recommended baking time. A skewer inserted into the centre should come out clean or with a few moist crumbs attached. Overbaking is one of the most common causes of dry chocolate cake.
Cool the Cakes Completely
Allow the cakes to cool briefly in their tins before transferring them to a wire rack. Do not add buttercream until the layers are completely cool, as even a little warmth can melt the frosting.
Chill Before Adding the Chocolate Drip
Once the cake has been filled and covered with buttercream, chill it until the frosting is firm. The cold surface helps control the chocolate drip and prevents it from running all the way down the sides.
Add the Honeycomb Last
Honeycomb absorbs moisture from the air and from the cake, which causes it to become sticky and lose its crunch. For the best result, arrange the honeycomb shards shortly before presenting or serving the cake.
Frequently Asked Questions
What makes this chocolate fudge cake moist?
A combination of oil, milk, eggs, brown sugar and hot liquid gives the chocolate sponge plenty of moisture. Oil is particularly helpful because it remains liquid when chilled.
Can I use coffee instead of hot water?
Yes. Hot coffee intensifies the chocolate flavour without giving the cake a strong coffee taste. Decaffeinated coffee can also be used.
Can I use natural cocoa instead of Dutch-processed cocoa?
Natural cocoa works particularly well in this recipe because its acidity reacts with the bicarbonate of soda. Dutch-processed cocoa has been neutralised and may not react in exactly the same way, although the baking powder will still provide some lift. For the most reliable result, use the type specified in the recipe.
Can I make the cake without vinegar?
The vinegar helps activate the bicarbonate of soda and contributes to the cake’s light texture. Its flavour will not be noticeable after baking, so it is best not to leave it out unless the recipe is adjusted accordingly.
Can I use butter instead of oil?
Butter can be used in some chocolate cake recipes, but it will change the texture of this one. Oil keeps the sponge especially moist and soft, even after refrigeration.
Why did my chocolate cake sink in the middle?
The cake may sink if the oven door is opened too early, the batter contains too much raising agent, the ingredients were measured incorrectly or the centre was not fully baked. Make sure the oven is preheated and avoid opening the door until the cake has had time to set.
How far in advance can I make this cake?
The sponge layers can be prepared up to two days in advance and stored in the refrigerator. The buttercream can be made two to three days ahead. The assembled cake can also be refrigerated, but add the honeycomb shortly before serving so it remains crisp.
Can I make this as a two-layer cake?
Yes. Divide the batter between two 24 cm (9½-inch) cake tins. The baking time may differ, so begin checking the cakes towards the end of the recommended time.
Chocolate Fudge Cake
INGREDIENTS LIST
- 240 g cake or plain flour (all-purpose)
- 60 tbsp unsweetened cocoa powder
- 150 g light brown sugar
- 200 g caster sugar
- 1 tsp bicarbonate of soda or baking soda
- 2 tsp baking powder
- 1 tsp fine sea salt
- 120 ml neutral-tasting oil (sunflower or vegetable)
- 2 medium eggs (50g each)
- 240 ml milk (or plant-based milk)
- 240 ml hot water or coffee
- 2 tsp white vinegar
Chocolate fudge buttercream – see my detailed recipe here
- 200 g dark chocolate (minimum 50% cocoa solids) (chopped)
- 300 g butter (room temperature)
- 400 g icing sugar
- 8 tbsp unsweetened cocoa powder (65g)
- 60 ml milk (or cream)
Chocolate drip
- 50 g dark chocolate (minimum 50% cocoa solids) (chopped)
- 25 g butter
Honeycomb / cinder toffee – see my detailed recipe here
Preparation
- Preheat the oven to 190°C / 170°C fan / 375°F / Gas 5. Line three 20cm (8inch) springform or sandwich pans with baking/greaseproof paper.
- Cake sponges: In a large bowl, mix together the flour, cocoa powder, sugars, bicarbonate of soda, baking powder and salt.
- Whisk in the oil and the eggs, followed by the milk and then the hot water (or coffee). Continue whisking until everything is well combined and smooth. The batter will be thin but that's normal.
- Baking: Divide the batter evenly between the three prepared pans. Bake for 24-26 minutes or until a toothpick inserted in the centre comes out clean. Remove the cakes from the oven and allow time to cool for 10 minutes before inverting them onto wire racks to cool fully.
- Buttercream: You can find a detail post about this buttercream here. Place the chopped chocolate in a heatproof bowl and set over a pan of gently simmering water to create a double boiler. Do not let the bowl touch the water. Stir occasionally until the chocolate is fully melted.In a large bowl or stand mixer, beat the butter until creamy (approx. 2 minutes). Add the melted chocolate, then beat again and finally add the icing sugar, cocoa and milk. Continue mixing until the buttercream is nice and smooth.Set aside 1/4 of the cream to pipe star shapes around the top edge of the cake later.
- Honeycomb: If you would like to add this you can follow my simple recipe which can be found here!
- Assembly: Once the cakes have cooled, place one on to your cake stand or serving plate. Using an offset spatula, evenly cover the top with buttercream. Place another cake on top and repeat with another layer of buttercream. Finally, place the last cake on top and spread the remaining buttercream over the top and sides to create a smooth coat. I used a bench scraper to finish the sides, to get them nice and straight.Place the cake in the fridge for about 15-20 mins at this stage to chill slightly, meanwhile make the chocolate drip.
- Chocolate drip: Melt the chocolate and butter together in a saucepan, then allow to cool slightly before use.
- Remove the cake from the fridge and drizzle the chocolate drip slowly around the top edge of the cake, allowing a little to drip down over the sides.
- Place the remaining buttercream into a piping bag fitted with a star nozzle and decorate with small dollops around the top. Refrigerate the cake for at least 30-60 minutes before slicing. This helps the cake hold its shape when cutting.
- Optional: I topped mine with honeycomb shards and pulsed the honeycomb crumbs into a powder which I sprinkled around the bottom edge. Serve at room temperature with a clean sharp hot knife.
FROM MY KITCHEN TO YOURS
Made this recipe?
I would love to hear how it turned out. Leave a comment and add a star rating to help other home cooks discover the recipe.

A recipe worth keeping
Save this recipe for another day
Pin it to one of your boards and keep it close for the next time you are ready to cook or bake.
Save to PinterestKeep cooking
You may also like
 Recipe
Chocolate Chia Pudding
A creamy vegan chocolate chia pudding topped with rich hazelnut fudge sauce for a simple, satisfying dessert or breakfast.
View recipe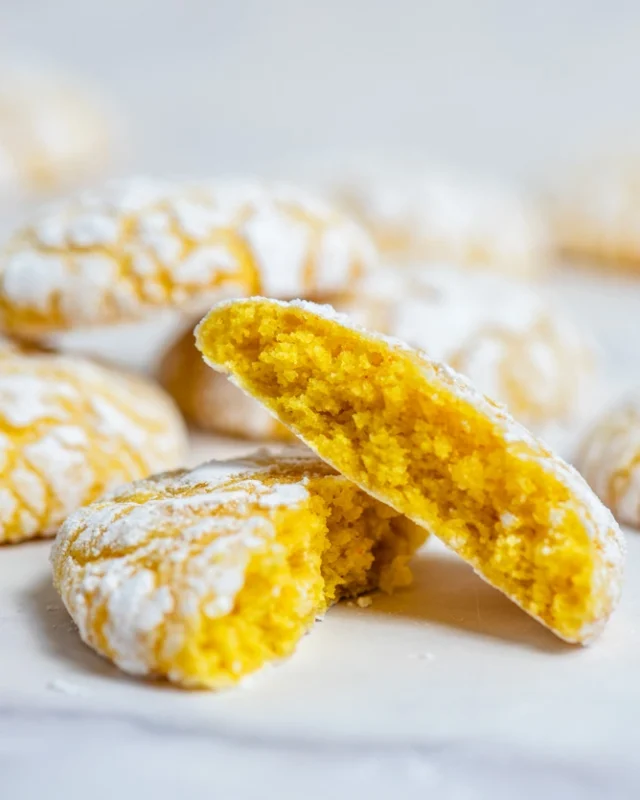 Recipe
Lemon Crinkle Cookies
Soft lemon crinkle cookies with snowy cracked tops and a bright, refreshing citrus flavour.
View recipe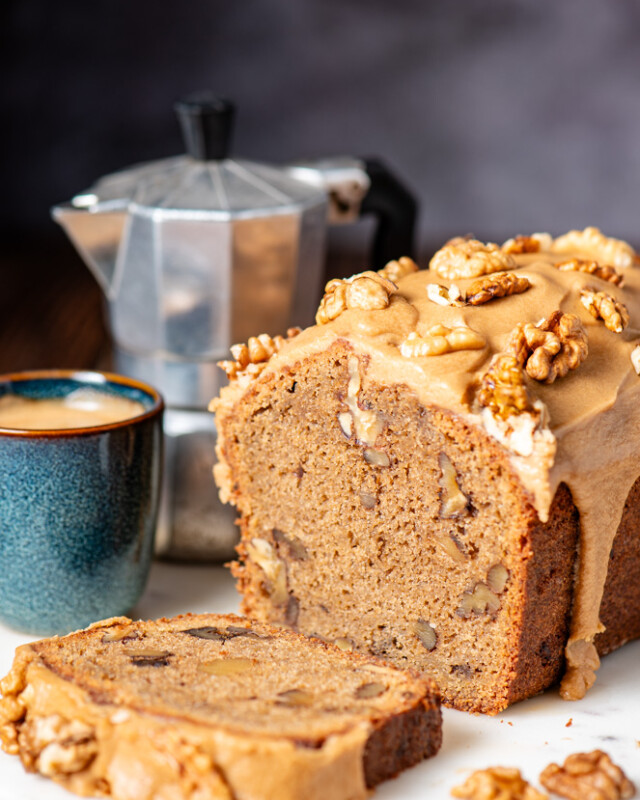 Recipe
Coffee & Walnut Loaf Cake
A moist coffee and walnut loaf cake finished with a smooth espresso and vanilla glaze.
View recipe
Around the table
Questions and kitchen notes
Made this recipe? Leave a rating and tell me how it turned out. Your questions and tips may also help the next person making it.