
From Nigel's Kitchen Table
Giant Flat Chocolate Chunk Cookies
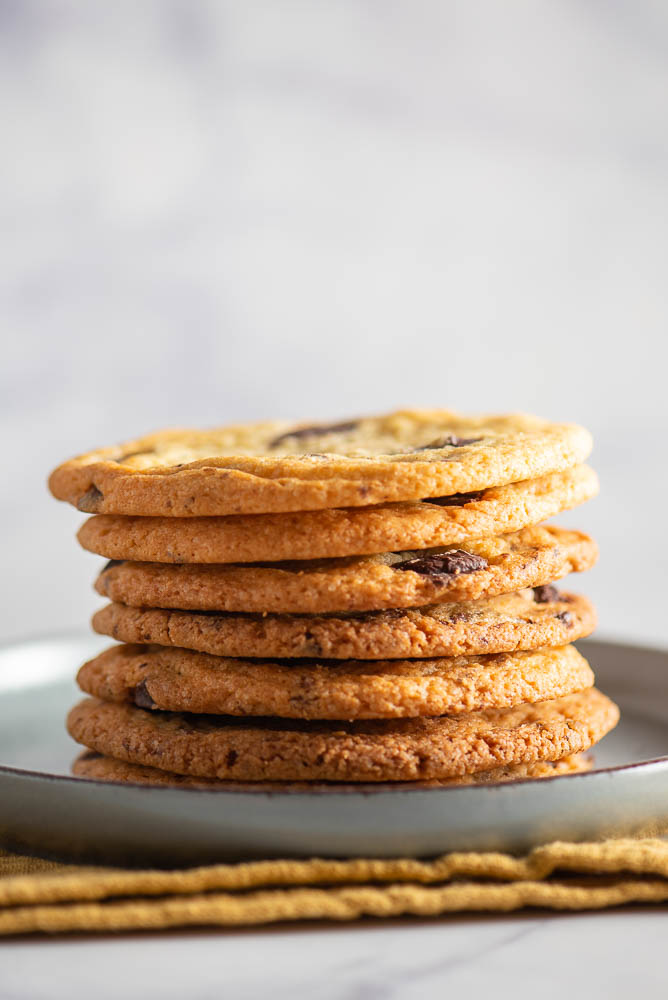
Giant chocolate chunk cookies with crisp vanilla edges, chewy centres and pools of melted chocolate.

Navigate the recipe
On this page
The recipe, step by step
These giant chocolate chunk cookies are what cookie dreams are made of. They have crisp, golden edges, wonderfully chewy centres and plenty of gooey chocolate in every bite.
There is nothing quite like eating a freshly baked cookie while it is still warm and the chocolate is soft and melting. Add a cold glass of milk or a hot cup of tea, and I am very happy indeed.
These cookies are deliberately large and flat, measuring approximately 12 cm (4½ inches) across once baked. They need plenty of space to spread, so avoid overcrowding the baking tray. I prefer to bake only three cookies on each tray, which gives them enough room to spread without touching.
This post includes two versions of the recipe. You can make the classic vanilla cookie dough filled with chocolate chunks or choose the rich chocolate dough variation. Both can be customised with different chocolates, nuts, dried fruit or favourite sweets such as M&M’s and Maltesers.
Take a look at the variations below for more ideas.
If you enjoy these giant cookies, you will also love my egg-free Chocolate Chip Cookie recipe.
Why You’ll Love These Giant Chocolate Chunk Cookies
- Crisp around the edges
- Soft and chewy in the centre
- Filled with generous chunks of chocolate
- Incredibly easy to prepare
- Ready in approximately 22 minutes
- Chilling the dough is optional
- Easy to customise with different additions
- Each cookie measures approximately 12 cm across
Two Giant Cookie Variations
This recipe gives you two different cookie dough options.
Vanilla Chocolate Chunk Cookies
The classic version has a buttery vanilla dough filled with dark chocolate chunks. It develops lightly crisp edges while remaining soft and chewy in the centre.
Chocolate Dough Cookies
The chocolate version has a richer dough for anyone who wants an even more intense chocolate experience.
Both versions can be customised with your favourite chocolate, nuts, dried fruit or sweets.
Recipe Highlights
- Ease: Incredibly easy to make.
- Taste and texture: Crisp around the edges with a chewy centre filled with chocolate.
- Serving suggestion: Delicious on their own or served with a glass of milk or a hot cup of tea or coffee.
- Quantity: Eight giant cookies.
- Time: Approximately 22 minutes, with optional chilling time.

Ingredients
For these giant chocolate chunk cookies, you will need the following ingredients:
- Butter – Butter provides flavour, richness and structure while helping the cookies spread during baking. I often use salted butter because a little salt enhances the chocolate and balances the sweetness. Unsalted butter can also be used when you prefer to control the salt separately. Bring the butter to room temperature before mixing. It should feel soft when pressed but should not be melted or greasy.
- Caster Sugar – Caster sugar adds sweetness and encourages the cookies to spread. It also helps produce lightly crisp, golden edges. Granulated sugar can usually be used as an alternative, although its larger crystals may take a little longer to cream with the butter.
- Soft Brown Sugar – Soft brown sugar adds moisture and a subtle caramel flavour. It is particularly important for creating the soft, chewy centre.
- Egg – The egg binds the ingredients together while adding moisture, richness and structure. Use a room-temperature egg so that it combines more smoothly with the butter and sugars.
- Baking Powder – Baking powder gives the cookies a small amount of lift and prevents the finished texture from becoming too dense.
- Plain or All-Purpose Flour – Flour provides the main structure of the cookies. Measure it carefully, as adding too much flour can prevent the cookies from spreading and make them dry or cakey.
- Dark Chocolate Chips or Chunks – Dark chocolate provides rich pockets of melted chocolate throughout the cookies. You can use chocolate chips, roughly chopped chocolate or a mixture of the two. As far as I am concerned, the more chocolate, the merrier!
Chocolate recommendations: bars – Lindt Excellence dark 70% bar 100g, Montezuma’s darkside 51% bar 90g, Menier dark cooking chocolate 100g, Green and Black’s Organic dark Chocolate 100g, 1kg bags – Callebaut dark chocolate, Callebaut milk chocolate, Callebaut white chocolate.
Nigel Recommends
The Vanilla I Recommend
I recommend Taylor & Colledge vanilla products because they add a delicious depth of flavour while enhancing the other ingredients in the recipe. Choose from pure vanilla extract, vanilla paste or vanilla pods, depending on the recipe and the intensity of flavour you prefer.
Nigel Recommends
Don’t Skip the Salt
I highly recommend adding a generous pinch of fine sea salt to your biscuit dough. It balances the sweetness, softens any bitterness and enhances flavours such as chocolate, vanilla, citrus and spices. You should not be able to taste the salt itself—it simply makes every flavour brighter, more pronounced and beautifully rounded.
Variations
This is where the fun begins. These cookies are perfect for experimenting with different flavours and additions.
Try Different Chocolate
Replace the dark chocolate with milk or white chocolate, or use a combination.
You can use chocolate chips, buttons or roughly chopped chocolate. Chopped chocolate often creates larger, more irregular pools of melted chocolate.
Favourite sweets can also be added, including:
- M&M’s
- Maltesers
- Pieces of Crunchie
- Chopped chocolate bars
- Mini peanut butter cups
Cut larger sweets into smaller pieces so that they are distributed evenly throughout the dough.
Add Nuts
Replace some of the chocolate or add approximately 100 g of coarsely chopped nuts.
Good options include:
- Pecans
- Pistachios
- Almonds
- Walnuts
- Hazelnuts
Toasting the nuts first can intensify their flavour, but allow them to cool completely before adding them to the dough.
Add Dried Fruit
Add approximately 50 g of dried fruit for extra sweetness and texture.
Try:
- Raisins
- Dried apricots
- Dried cranberries
- Cherries
- Chopped dates
Cut larger dried fruits into small pieces before folding them into the dough.
Favourite Flavour Combinations
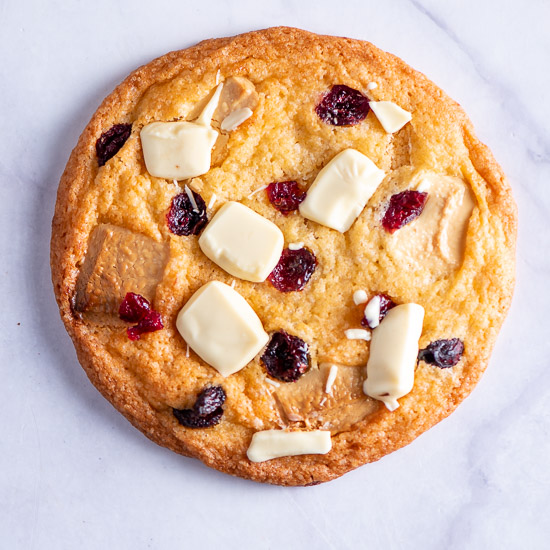
White Chocolate and Cranberry
The sweetness of white chocolate works beautifully with the slightly sharp flavour of dried cranberries.
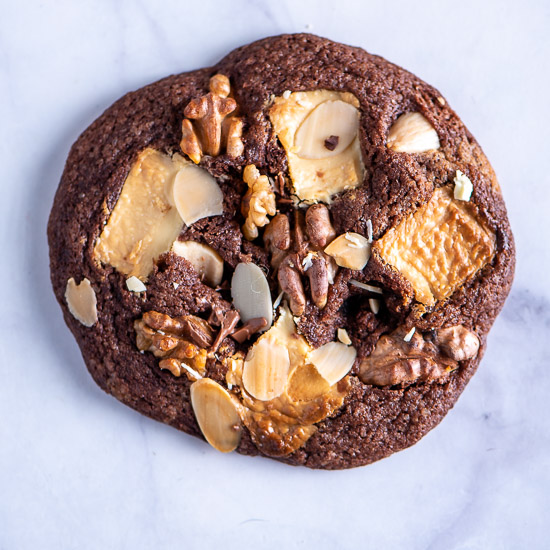
White Chocolate and Walnut
Creamy white chocolate and earthy walnuts make a rich and satisfying combination.
Milk Chocolate and Hazelnut
Milk chocolate and toasted hazelnuts give the cookies a flavour reminiscent of chocolate hazelnut spread.
Dark Chocolate and Orange
Add finely grated orange zest to the dough and pair it with dark chocolate chunks.
Chocolate and Salted Caramel
Add pieces of firm caramel or caramel-filled chocolate and finish the baked cookies with a small pinch of flaky sea salt.
Nutrition
Serving: one vanilla chocolate chunk cookie
Nutrition per serving
- Calories: 290.74 kcal — 15%
- Total Fat: 13.65 g — 20%
- Carbohydrates: 39.08 g — 15%
- Sugars: 24.48 g — 27%
- Protein: 3.32 g — 7%
- Sodium: 178.71 mg — 9%
- Fiber: 1.44 g — 5%
Percent Daily Values are based on a 2,000-calorie diet.
Nutrition information is provided as an estimate and may vary according to the ingredients, additions and portion sizes used. These values apply to the vanilla chocolate chunk cookie variation.
Storage and Freezing
Allow the cookies to cool completely before transferring them to an airtight container.
Store them at room temperature for 5–7 days.
Placing baking paper between the layers can help prevent the cookies from sticking together.
For a warm, freshly baked texture, reheat an individual cookie briefly before serving. Take care, as the chocolate can become very hot.
Can You Freeze the Cookie Dough?
Yes. Portion the dough into individual cookie balls and place them on a tray or plate lined with baking paper.
Freeze for approximately 30 minutes or until completely firm. Transfer the frozen portions to a freezer-safe airtight container and store them for up to three months.
The cookies can be baked directly from frozen. Add approximately one or two minutes to the usual baking time and check that the centres are baked to your preferred texture.
Freezing the portions separately first prevents them from sticking together in the container.
Can You Freeze Baked Cookies?
Allow the baked cookies to cool completely before placing them in a freezer bag or airtight freezer-safe container.
Freeze them for up to one month.
When you are ready to serve them, remove the required number of cookies and allow them to defrost at room temperature.
Tools You’ll Need
Here is some of the kitchen equipment I use and recommend for making these giant chocolate chunk cookies:
- Wire cooling rack
- Large mixing bowl
- Electric hand whisk or stand mixer
- Silicone spatula
- Digital kitchen scales
- Large baking trays
- Baking paper
- Baking mat – I love using these 42 × 29.5 cm silicone baking mats because they prevent food from sticking to the baking tray and are incredibly easy to clean. This handy set includes two reusable mats.
- Ice cream scoop
My recommendation: Ice Cream Scoops with Easy Trigger Set of 3, large (3 Tbsp/45ml/6cm/1.5 oz), medium (2 Tbsp/30ml/5cm/1 oz), small (1 Tbsp/15ml/4cm/0.5 oz) – These three different sized scoops are perfect for ice cream, melons and cookies.
Recipe tips
Use Room-Temperature Butter
Cold butter will not cream properly with the sugars and can leave the dough uneven. Properly softened butter should hold a gentle indentation when pressed but should not appear melted or oily.
Measure the Flour Carefully
Too much flour is one of the most common reasons cookies fail to spread. For the most accurate result, weigh the flour with digital kitchen scales. Avoid pressing or packing flour into a measuring cup.
Expect a Slightly Sticky Dough
The dough should feel a little sticky. Do not keep adding flour simply to make it easier to handle, as this may produce thick, dry cookies that do not spread properly. Chilling the dough briefly will make it firmer and easier to portion.
Make the Cookies the Same Size
Divide the dough into eight evenly sized portions. Using digital scales or a large cookie scoop will help the cookies bake and spread at a similar rate.
Leave Plenty of Space Between Them
These cookies spread to approximately 12 cm (4½ inches), so they need plenty of room on the tray. I recommend placing only three cookies on each large baking tray.
Use Baking Paper
Line the baking trays with baking paper to prevent sticking and make the baked cookies easier to remove. Avoid placing the dough on a warm tray, as this can cause the butter to melt and the cookies to spread before they enter the oven.
Chilling the Dough Is Optional
You can bake the cookies immediately, but resting the dough can produce slightly better flavour and texture. Chilling gives the flour time to absorb moisture from the other ingredients. It also firms the butter, which slows the initial spread during baking. Cookies made with chilled dough may have slightly thicker, more rounded edges. Dough baked immediately will generally spread more quickly and may produce thinner, crisper edges.
Don’t Overchill for Very Flat Cookies
Because these are intended to be giant and flat, very cold dough may not spread as much. When the dough has been refrigerated for a long time, allow it to stand at room temperature briefly before baking.
Add Chocolate on Top
Reserve a few chocolate chunks and press them into the tops of the dough portions before baking. This makes the finished cookies look even more inviting and ensures there is visible chocolate in every cookie.
Bake One Tray at a Time
For the most even result, bake one tray in the centre of the oven at a time. When baking two trays together, their positions may need to be exchanged partway through baking, which can cause a sudden change in oven temperature.
Don’t Overbake the Cookies
Remove the cookies when the edges are set and lightly golden but the centres still look slightly soft. They will continue to set on the hot baking tray after leaving the oven. Baking until the centres appear completely firm can result in dry or overly crisp cookies.
Leave Them on the Baking Tray Briefly
Freshly baked cookies are very soft and can break when moved immediately. Allow them to rest on the tray for several minutes before carefully transferring them to a wire cooling rack.
Add a Pinch of Salt
A little salt balances the sweetness and brings out the richness of the chocolate. You should not be able to taste the salt itself; it should simply make the other flavours more pronounced.
Frequently Asked Questions
Why are these cookies called giant flat cookies?
Each cookie spreads to approximately 12 cm (4½ inches) during baking. The large portions and spreading dough create cookies that are wide and relatively flat, with crisp edges and chewy centres.
How many cookies should I place on one baking tray?
I recommend placing three cookies on a large baking tray. They need plenty of space to spread without touching one another.
Do I have to chill the cookie dough?
No. Chilling is optional, and the cookies can be baked immediately. Resting the dough can deepen the flavour, firm the butter and create slightly thicker edges.
Why didn’t my cookies spread?
The dough may contain too much flour, the butter may have been too cold or the dough may have been chilled for too long. Check that the flour was measured accurately and allow very cold dough to soften slightly before baking.
Why did my cookies spread too much?
The butter may have been overly soft or melted, the baking tray may have been warm or the dough may not have contained enough flour. Chilling the dough briefly before baking can help control excessive spreading.
How do I make the centres chewier?
Avoid overbaking the cookies. Remove them from the oven when the edges are set but the centres still look slightly soft. They will continue to firm as they cool. The soft brown sugar also helps create their chewy texture.
Can I use chocolate chips instead of chopped chocolate?
Yes. Chocolate chips, chopped chocolate or a combination can all be used. Chopped chocolate tends to create larger pools of melted chocolate, while chips retain their shape more clearly.
Can I make smaller cookies?
Yes, but smaller portions will bake more quickly. Reduce the baking time and begin checking them earlier to avoid overbaking.
Can I bake the cookie dough from frozen?
Yes. Bake the frozen portions directly from the freezer and add approximately one or two minutes to the normal baking time.
Can I prepare the dough in advance?
Yes. The dough can be refrigerated before baking or portioned and frozen for up to three months. Cover refrigerated dough well to prevent it from drying out or absorbing flavours from the fridge.

Giant Flat Chocolate Chunk Cookies
INGREDIENTS LIST
- 80 g butter (room temperature)
- 100 g caster sugar
- 60 g light brown sugar
- 1 medium egg (50g)
- 1 tsp pure vanilla extract or 1/2 tsp of vanilla paste
- 130 g plain flour (all-purpose)
- 1 tsp baking powder
- ½ tsp fine sea salt
- 120 g dark or milk chocolate (chopped or chips)
Preparation
- Cookie dough: In a bowl, cream the butter, and both the sugars together until light and fluffy. 2-3 minutes approx.
- Add the vanilla, the egg and mix until combined.
- Sift the flour, salt and baking powder into the bowl and mix together to create a smooth dough. Then add your choice of chopped chocolate or chips. I usually reserve a few pieces of chopped chocolate for decorating the tops after removing them from the oven.
- Preheat the oven to 200°C / 180°C fan / 400°F / Gas 6 and line 2-3 baking trays with baking/parchment paper.
- Shaping: Using a 2 tbsp ice cream scoop or a large spoon, scoop out 8 balls of cookie dough onto your prepared trays. I place 3-4 cookie balls per per tray and slightly push down on the balls to flatten them out.
- Resting the dough: is completely optional and does have some advantages, read the tips section on the blog post for more details. Freezing the dough: At this stage the dough can also be frozen for baking another day.
- Baking: Place the trays on the preheated oven for 10-12 minutes, until browned around the edges. Once baked and while they are still hot I like to decorate the tops of the cookies with a few extra pieces of chopped chocolate and also bang the baking tray on the work top to help flatten out the cookies evenly.
- Let them rest on the baking tray for 5 minutes before transferring to a wire rack to cool.
FROM MY KITCHEN TO YOURS
Made this recipe?
I would love to hear how it turned out. Leave a comment and add a star rating to help other home cooks discover the recipe.
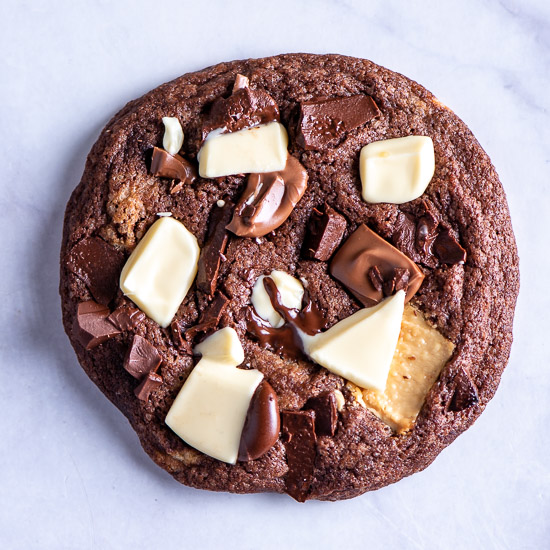
Giant Flat Double Chocolate Cookies
INGREDIENTS LIST
- 80 g butter (room temperature)
- 100 g caster sugar (or granulated)
- 60 g light brown sugar
- 1 medium egg (50g)
- 1 tsp pure vanilla extract or 1/2 tsp of vanilla paste
- 110 g plain flour (all-purpose)
- 2 tbsp unsweetened cocoa powder (16g)
- 60 g hazelnuts (optional)
- 1 tsp baking powder
- ½ tsp fine sea salt
- 120 g white chocolate (chopped or chocolate chips)
Preparation
- Cookie dough: In a bowl, cream the butter, and both the sugars together until light and fluffy. 2-3 minutes approx.
- Add the vanilla, the egg and mix until combined.
- Sift the flour, cocoa, salt and baking powder into the bowl and mix together to create a smooth dough. Then add the chopped chocolate and the hazelnuts to the dough. I usually reserve a few pieces of chopped chocolate for decorating the tops after taking them out of the oven.
- Preheat the oven to 200°C / 180°C fan / 400°F / Gas 6. And line 2-3 baking trays with baking/parchment paper.
- Shaping: Using a 2 tbsp ice cream scoop or a large spoon, scoop out 8 balls of cookie dough onto your prepared trays. I place 3-4 cookie balls per per tray and slightly push down on the balls to flatten them out.
- Resting the dough: is completely optional and does have some advantages, read the tips section on the blog post for more details. Freezing the dough: At this stage the dough can also be frozen for baking another day.
- Baking: Place the trays on the preheated oven for 10-12 minutes, until browned around the edges. Once baked and while they ae still hot I like to decorate the tops of the cookie with a few extra pieces of chopped chocolate and also bang the baking tray on the work top to help flatten out the cookies evenly.
- Let them rest on the baking tray for 5 minutes before transferring to a wire rack to cool.
FROM MY KITCHEN TO YOURS
Made this recipe?
I would love to hear how it turned out. Leave a comment and add a star rating to help other home cooks discover the recipe.
A recipe worth keeping
Save this recipe for another day
Pin it to one of your boards and keep it close for the next time you are ready to cook or bake.
Save to PinterestKeep cooking
You may also like
 Recipe
Chocolate Chia Pudding
A creamy vegan chocolate chia pudding topped with rich hazelnut fudge sauce for a simple, satisfying dessert or breakfast.
View recipe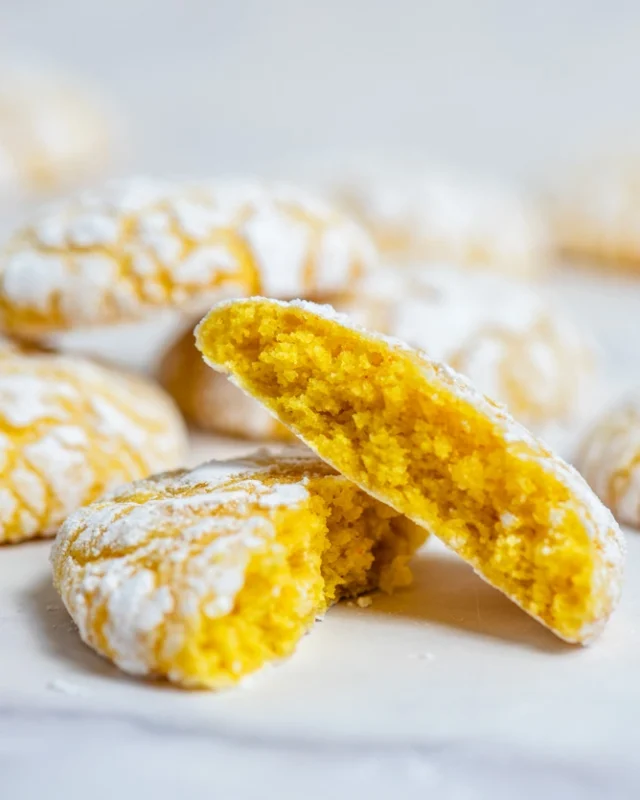 Recipe
Lemon Crinkle Cookies
Soft lemon crinkle cookies with snowy cracked tops and a bright, refreshing citrus flavour.
View recipe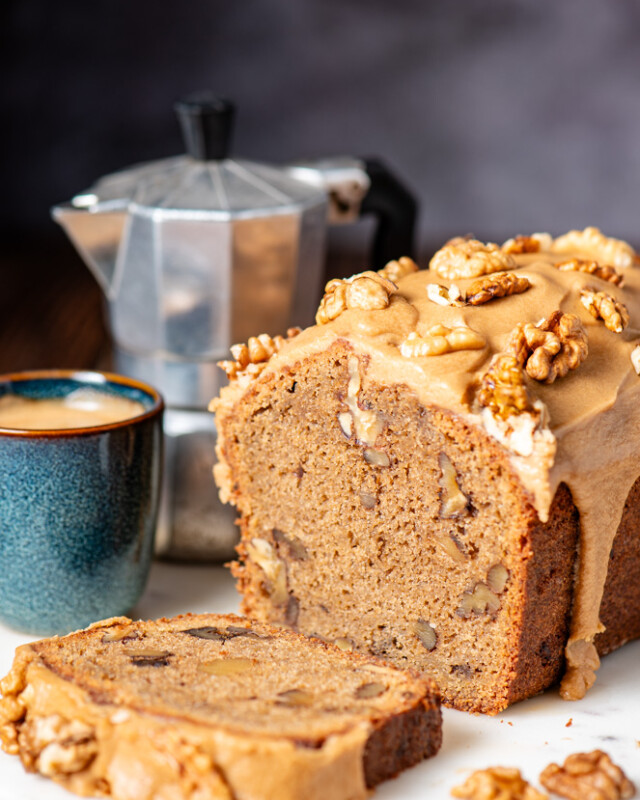 Recipe
Coffee & Walnut Loaf Cake
A moist coffee and walnut loaf cake finished with a smooth espresso and vanilla glaze.
View recipe
Around the table
Questions and kitchen notes
Made this recipe? Leave a rating and tell me how it turned out. Your questions and tips may also help the next person making it.